


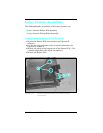


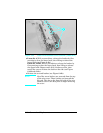

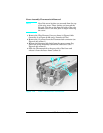
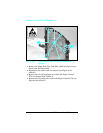
5 Remove the (1) Heat Lamp lead (thermoswitch screw)(see
Figure 6-43 callout 1).
6 Press the thermoswitch tab towards the paper exit flag to
release the tab (see Figure 6-43 callout 2). Slide the
Thermoswitch off the fuser frame (see Figure 6-43, callout 3).
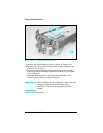
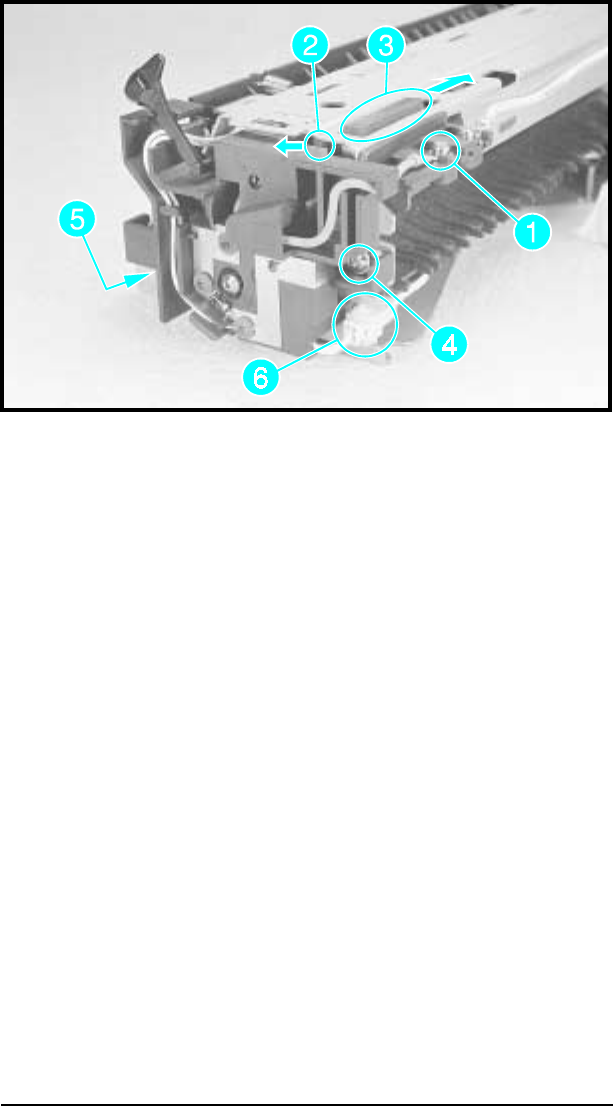
7 LaserJet 4: Remove the cable retainer from the fuser frame,
and free the heat lamp lead from the cable retainer. Note the
orientation of the cable retainer.
LaserJet 4 Plus/5: Remove the (2) screws from the end cover
(see Figure 6-43, callouts 4 and 5). Note the wavy washer on
the (1) screw touching the copper contact (see Figure 6-43,
callout 4). Remove the thermistor connector from the frame
and pull apart (see Figure 6-43, callout 6). Note the position
of the Fuser Shipping Lever and remove from assembly.
(continued on next page)
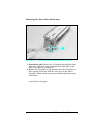
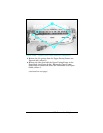
Figure 1-43 Left Side Fuser Cover
6-52 Removal and Replacement