216
Scanning
2
Load the document(s) face up into the ADF with the top edge of the document(s) in first.
OR
Place a single document face down on the document glass, and close the document cover.
For details about loading a document, see "Making Copies From the ADF" on page 191 or "Making Copies From
the Document Glass" on page 189.
3
Ensure that
Scan to
is highlighted, and then press the
(Set)
button.
You can also scan documents by the following steps.
a
Press the
(Scan)
button.
b
Ensure that
Scan to USB Memory
is highlighted, and then press the
(Set)
button.
4
Press the button to select the folder to store the scanned file in, and then press the
(Set)
button.
If you do not specify the folder, skip this step.
5
Configure the scan settings as necessary.
Settings such as file format and color mode are available. To configure these settings, press the button until
Preferences
is highlighted, and then press the
(Set)
button. For details about setting items, see "Scan
Defaults" on page 121.
6
Ensure that
Start Scan
is highlighted, and then press the
(Start)
button.
Using the ID Scan
1
Perform steps 1 to 5 in "Basic Scanning Procedures" on page 215.
Be sure to place the ID card on the document glass.
2
Press the button until
Start ID Scan
is highlighted, and then press the
(Set)
button.
After the front side of the ID card is scanned, the display prompts you to turn it over.
a
To scan the rear side of the ID card, turn it over, press the button until
Continue
is highlighted, and
then press the
(Set)
button.
b
To finish scanning without scanning the rear side of the ID card, press the button until
Save Now
is
highlighted, and then press the
(Set)
button.
Sending an E-mail With the Scanned Image
To send an e-mail attached with the scanned image from your printer, follow the steps below:
•Set up
E-mail Server Settings
of
E-mail Alert
on the
Dell Printer Configuration Web Tool
. See "E-mail Alert" on
page 104 for more details. For information about your e-mail server, contact your system administrator or your local
Internet service provider (ISP).
• Register e-mail addresses in the Address Book using the
Dell Printer Configuration Web Tool
. See "Setting an
E-mail Address Book" on page 216 for more details.
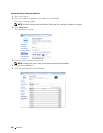
Setting an E-mail Address Book
1
Open a web browser.
2
Enter the IP address of the printer in the address bar and click
Go
.
The printer's web page appears.
NOTE:
For details on how to check the IP address of the printer, see "Verifying the IP Address" on page 45.


