Installing Printer Drivers on Linux Computers (CUPS)
67
Operation on Ubuntu 12.04 LTS
Setup Overview
1
Install the printer driver.
2
Set up the print queue.
3
Specify the default queue.
4
Specify the printing options.
Installing the Printer Driver
1
Select
Applications
System Tools
Terminal
.
2
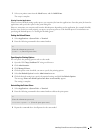
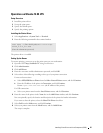
Enter the following command in the terminal window.
The printer driver is installed.
Setting Up the Queue
To execute printing, you must set up the print queue on your workstation.
1
Open the URL "
http://localhost:631
" using a web browser.
2
Click
Administration
.
3
Click
Add Printer
.
4
Enter the user name and the administrator password, and click
OK
.
5
Select either of the following according to the type of your printer connection.
For network connections:
a
Select
LPD/LPR Host or Printer
from the
Other Network Printers
menu, and click
Continue
.
b
Enter the IP address of the printer in
Connection
, and click
Continue
.
Format:
lpd://xxx.xxx.xxx.xxx
(the IP address of the printer)
For USB connections:
a
Select your printer name from the
Local Printers
menu, and click
Continue
.
6
Enter the name of the printer in the
Name
box in the
Add Printer
window, and click
Continue
.
You can optionally specify the location and description of the printer for further information.
If you want to share the printer, select the
Share This Printer
check box.
7
Select
Dell
from the
Make
menu, and click
Continue
.
8
Select your printer name from the
Model
menu, and click
Add Printer
.
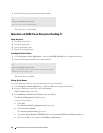
The setup is complete.
sudo dpkg –i
(Enter the file path)/
dell-color-mfp-
e525w_x.x-x_all.deb
(Enter the administrator password)


