


218
Scanning
6
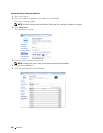
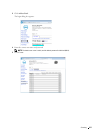
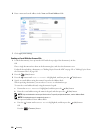
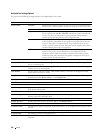
Enter a name and e-mail address in the
Name
and
E-mail Address
fields.
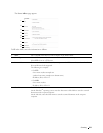
7
Click
Apply New Settings
.
Sending an E-mail With the Scanned File
1
Load the document(s) face up into the ADF with the top edge of the document(s) in first.
OR
Place a single document face down on the document glass, and close the document cover.
For details about loading a document, see "Making Copies From the ADF" on page 191 or "Making Copies From
the Document Glass" on page 189.
2
Press the
(Scan)
button.
3
Press the button until
Scan to E-mail
is highlighted, and then press the
(Set)
button.
4
Specify an e-mail address using the numeric keypad or the Address Book.
When specifying destinations, you can select
TO
or
BCC
as a destination type.
To enter the e-mail address directly using the numeric keypad:
a
Ensure that
Enter Address
is highlighted, and then press the
(Set)
button.
b
Enter the e-mail address using the numeric keypad, and then press the
(Set)
button.
NOTE:
Only one destination can be specified at a time. To specify multiple destinations, use the Address Book.
NOTE:
The destination type is automatically set to
TO
.
To select personal addresses from Address Book:
a
Press the button until
Address Book
is highlighted, and then press the
(Set)
button.
OR
Press the
(Contacts)
button.