42
Setting Up Your Printer
5
Ensure that
Please Enter Date
appears. Specify the current date, and then press the
(Set)
button.
6
Ensure that
Please Enter Time
appears. Specify the current time, and then press the
(Set)
button.
7
Press the
(Set)
button for specifying fax settings.
If you want to skip the steps for specifying fax settings, press the
(Start)
button and then restart the printer.
8
Ensure that
Please Enter Fax Number
appears. Enter your fax number, and then press the
(Set)
button.
9
Ensure that
Enter Fax Header Name
appears. Enter a name, and then press the
(Set)
button.
10
Press the
(Set)
button, and then restart the printer.
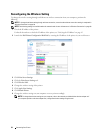
Printer Setup Using the Software and Documentation Disc
1
Insert the
Software and Documentation
disc into your computer to start
Dell Printer Easy Install
.
2
Double-click the
Dell Color MFP E525w Installer
icon, and follow the on-screen instructions to connect the
computer and the printer.
NOTE:
If the Software and Documentation disc does not automatically launch, try the following steps.
For Windows Vista
®
, Windows
®
7, Windows Server
®
2003, Windows Server
®
2008, and Windows Server
®
2008 R2:
1
Click
Start
All Programs
(for Windows Vista
®
and Windows
®
7)
Accessories
(for Windows Vista
®
and
Windows
®
7)
Run
.
2
Enter
D:\setup.exe
(where D is the drive letter of the optical drive), and then click
OK
.
For Windows
®
8, Windows
®
8.1, Windows Server
®
2012 and Windows Server
®
2012 R2:
1
Point to the bottom right corner of the screen, and then click
Search
Enter
Run
in the search box, click
Apps
,
and then click
Run
.
2
Enter
D:\setup.exe
(where D is the drive letter of the optical drive), and then click
OK
.


