


Return to Section TOC Return to Section TOC Return to Section TOC Return to Section TOC
Return to Master TOC Return to Master TOC Return to Master TOC Return to Master TOC
F-142 F-142
SENSOR CALIBRATION TEST (FOR DISPLAY BOARD) (continued)
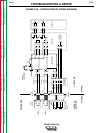
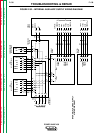
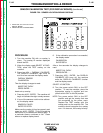
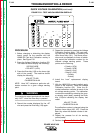
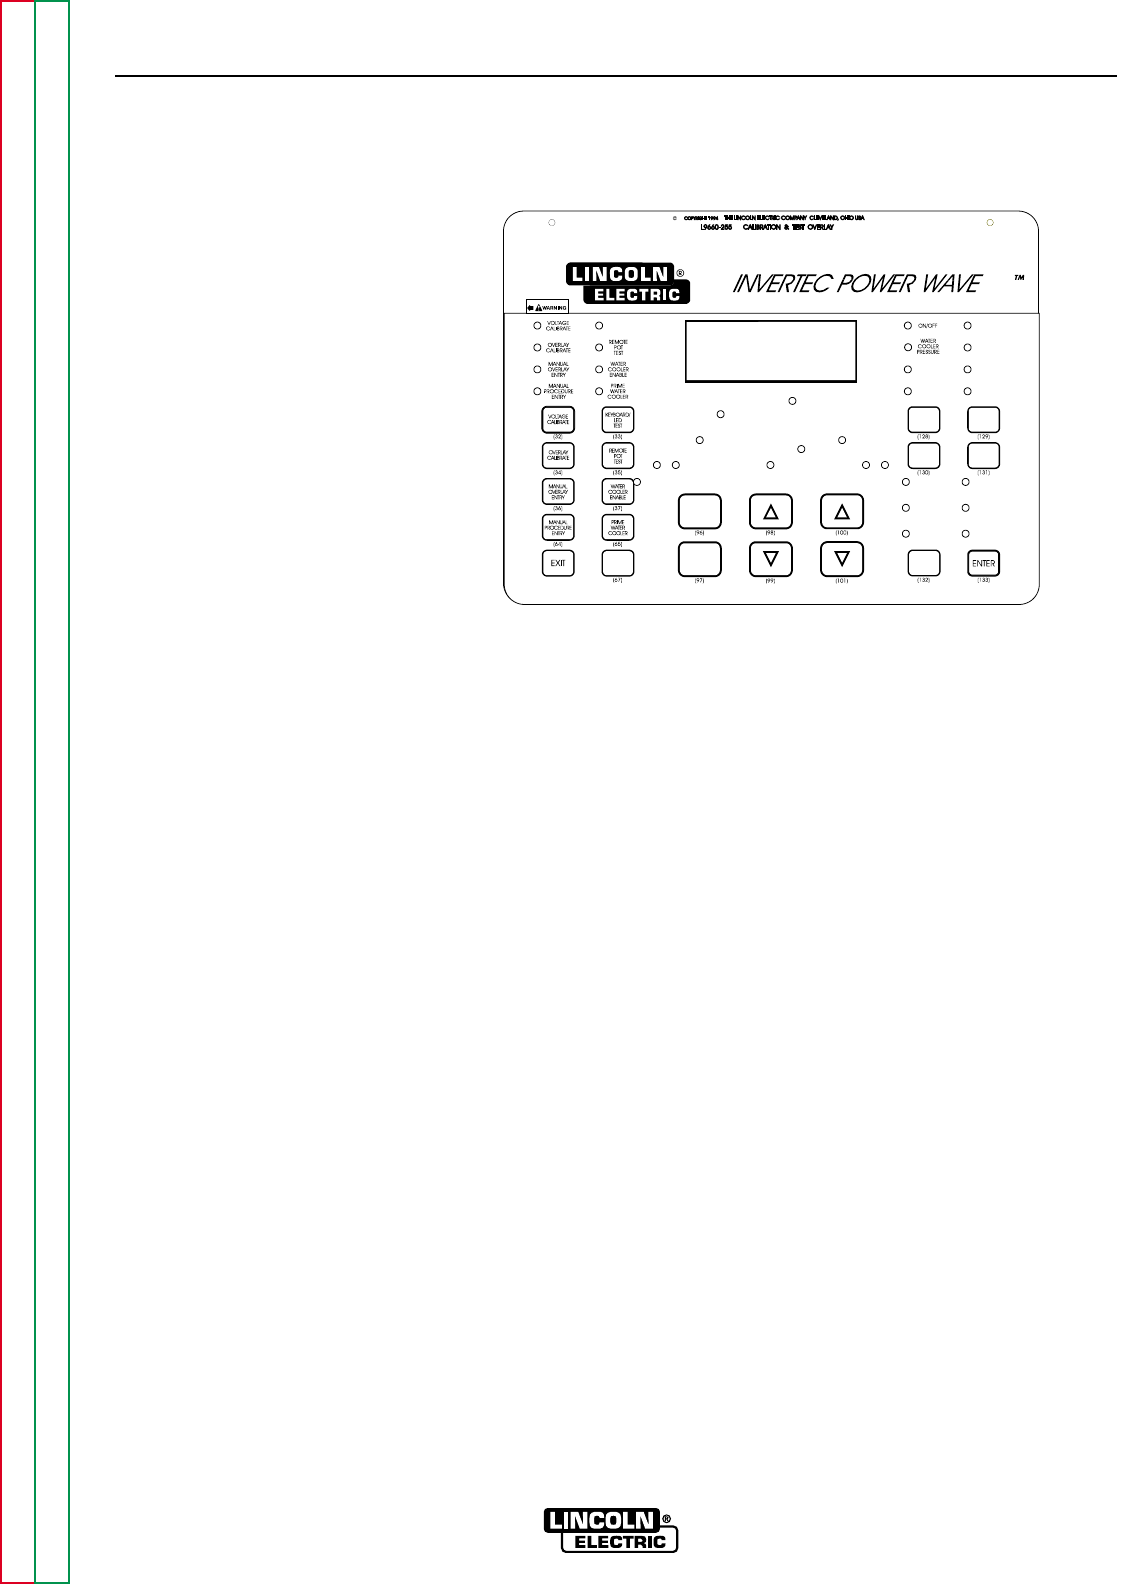
FIGURE F.53 - SENSOR LOCATION BEHIND OVERLAY
TROUBLESHOOTING & REPAIR
PROCEDURE
1. Turn the machine ON with no overlay in
place. The overlay ID number displayed
should be 255.
2. When the display reads SELECT A FUNC-
TION, place the TEST overlay on the
machine.
3. Press key #34 - OVERLAY CALIBRATE.
The OVERLAY CALIBRATE light turns on
and for a few seconds the display reads:
OVERLAY SENSOR
CALIBRATION
Then the display changes to read:
INSERT REF OVRLY
PRESS ENTER . . .
Insert set-up overlay
4. Press key #133 - ENTER. The machine will
begin to calibrate the eight overlay sensors.
5. If one of the sensors could not be calibrat-
ed, the display reads:
SENSOR X FAILED
ENTER TO RETRY
Make sure the overlay is lined up properly and
press key #133 - ENTER. This will cause the
machine to try to calibrate the sensor again. If
a particular sensor continues to fail. Clean
sensor or replace display board.
6. If the calibration procedure is successful,
the display reads:
CALIBRATION
SUCCESSFUL
After a few seconds the display changes to
read:
INSERT CAL OVRLY
PRESS ENTER . . .
7. Press key #133 - ENTER. the OVERLAY
CALIBRATE LED turns off, the machine
exits the OVERLAY CALIBRATE function
and the display reads:
SELECT A FUNCTION
8. Turn the power switch SW1 to the OFF
position. To use the machine, place the
appropriate overlay in position and turn
power switch SW1 to the ON position.
NOTE: Turn power switch SW1 to the OFF
position and get the overlay that was
not recognized by the power wave.
Replace the TEST overlay with this
overlay and turn the machine ON. The
machine should recognize the overlay
now. If it does not, the overlay is faulty.
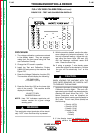
POWER WAVE 450
1. LEADS 300, 301 TO PLUG J15 ON
DISPLAY BOARD
2. PIEZO-ELECTRIC ALARM BUZZER