


Adding or Removing Hardware
248 Installation, Upgrades and Additions for Avaya CMC1 Media Gateways
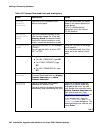
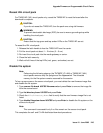
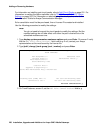
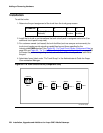
3. Check the Date and Timestamp fields to determine whether to revert back to a previous
image.
In the following example, we are reverting back to Image 2, because it has the older date
and time stamp.
Note:
Note: In most cases, the image with the more recent date and time stamp is the new
firmware image file.
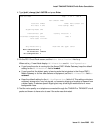
4. Type set boot-image board UUCSS image 1 | 2 and press Enter.
Example: set boot-image board 1C07 image 2
The system responds with Command Successfully Completed.
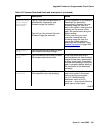
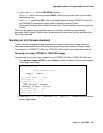
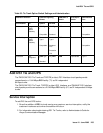
5. Type get boot-image UUCSS and press Enter to check the status of the firmware images
on the target circuit pack.
Note that the values in the Reboot Image field have changed.
Note:
Note: If a TN799C/DP C-LAN or TN2305 VAL circuit pack, reseat them to activate the
new firmware image. Go to Reseat VAL circuit pack
on page 245.
get boot-image 1C07
DISPLAY FIRMWARE IMAGE(S)
Image 1 Image 2
Board Type: TN2501 TN2501
FW Vintage: 02 01
HW Signature: 02 02
Suffix: A A
Date: 03/02/02 03/02/01
Timestamp: 10:30:50 12:42:18
CRC Checksum: Good Good
Active Image: Yes No
Reboot Image: No Yes