


551Misc Menu Operations
Chapter 10 Misc Menu, Etc.
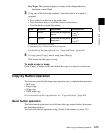
To display a menu for the aspect ratio 4:3, auto side flags, and auto
crop settings
In the Misc >Enable >Side Flags menu, press [Setup >SWER >Side Flags].
To display a menu for assigning the side flags on/off function to a
cross-point button
In the Misc >Enable >Side Flags menu, press [Side Flags Button Assign].
Enabling and disabling side flags with a button operation
For example, to enable side flags for the background B row of the M/E-1 bank,
use the following procedure.
1
First, in the Setup menu assign the rightmost cross-point button to the
[SIDE FLAG] button.
For details of the assignment operation, see “Cross-Point Settings (Xpt
Assign Menu)” in Chapter 16 (Volume 2).
2
Press the [SIDE FLAG] button at the right end of the background B row of
the M/E-1 bank.
The button you pressed lights amber, and this enables the side flags.
Notes
• The operations of enabling or disabling the side flags by menu operation
and by control panel button operation are linked.
• When the auto side flags are on, selecting a 4:3 video material
automatically lights the [SIDE FLAG] button, but if you press this
button, turning it off, the side flags are temporarily disabled.
However, when you select a different 4:3 video material, the [SIDE
FLAG] button automatically lights once again, enabling the side flags.
Creating an image with side flags
For example, to create an image with side flags in the background B row of the
M/E-1 bank, use the following procedure.
1
In the M/E-1 bank cross-point control block, hold down the [UTIL] button,
and in the background A row select the signal (utility bus 1 signal) you
want to insert in the side flag areas.
2
In the background B row, press the cross-point button corresponding to the
4:3 video material.