Replacing Consumables
Replacing Drum Cartridges C, M, Y, or K
The machine displays the following messages when a drum cartridge C, M, Y or K needs to
be replaced. When the message is displayed, contact Customer Support at
dell.com/contactdell.
Follow the instructions described below and replace the drum cartridge.
If you continue to copy or print without replacing the drum cartridge after the message is
displayed on the touch screen, the machine will stop after copying or printing the number of
pages shown in the following table.
Message Remaining Page Yield Solution
Please order a Drum
Cartridge XX.
Approx. 10,000 pages You do not need to
replace the Drum
Cartridge immediately.
Order the Drum
Cartridge displayed on
the screen.
Drum Cartridge needs
to be replaced.
- Replace the drum
cartridge with a new
one.
Note • To protect the drum cartridges against bright light, close the inner cover within five minutes. If the
front cover remains open for more than five minutes, print quality may deteriorate.
• The use of drum cartridges not recommended by Dell may degrade image quality and performance.
Use only drum cartridges recommended by Dell.
• To prevent electric shock, always turn off the machine and disconnect the power cable from the
grounded outlet before performing maintenance.
• Do not expose drum cartridges to direct sunlight or strong light from indoor fluorescent lighting. Do not
touch or scratch the surface of the drum. Doing so may result in unsatisfactory printing.
• The remaining page yield is applicable when A4 paper LEF (
) is used. The value is an estimate and
varies depending on the conditions such as the paper size, the paper orientation, the number of pages
continuously print, and the machine operating environment.
• Images output from the machine may get dirty after the message "Please order a Drum Cartridge XXX"
appears on the touch screen.
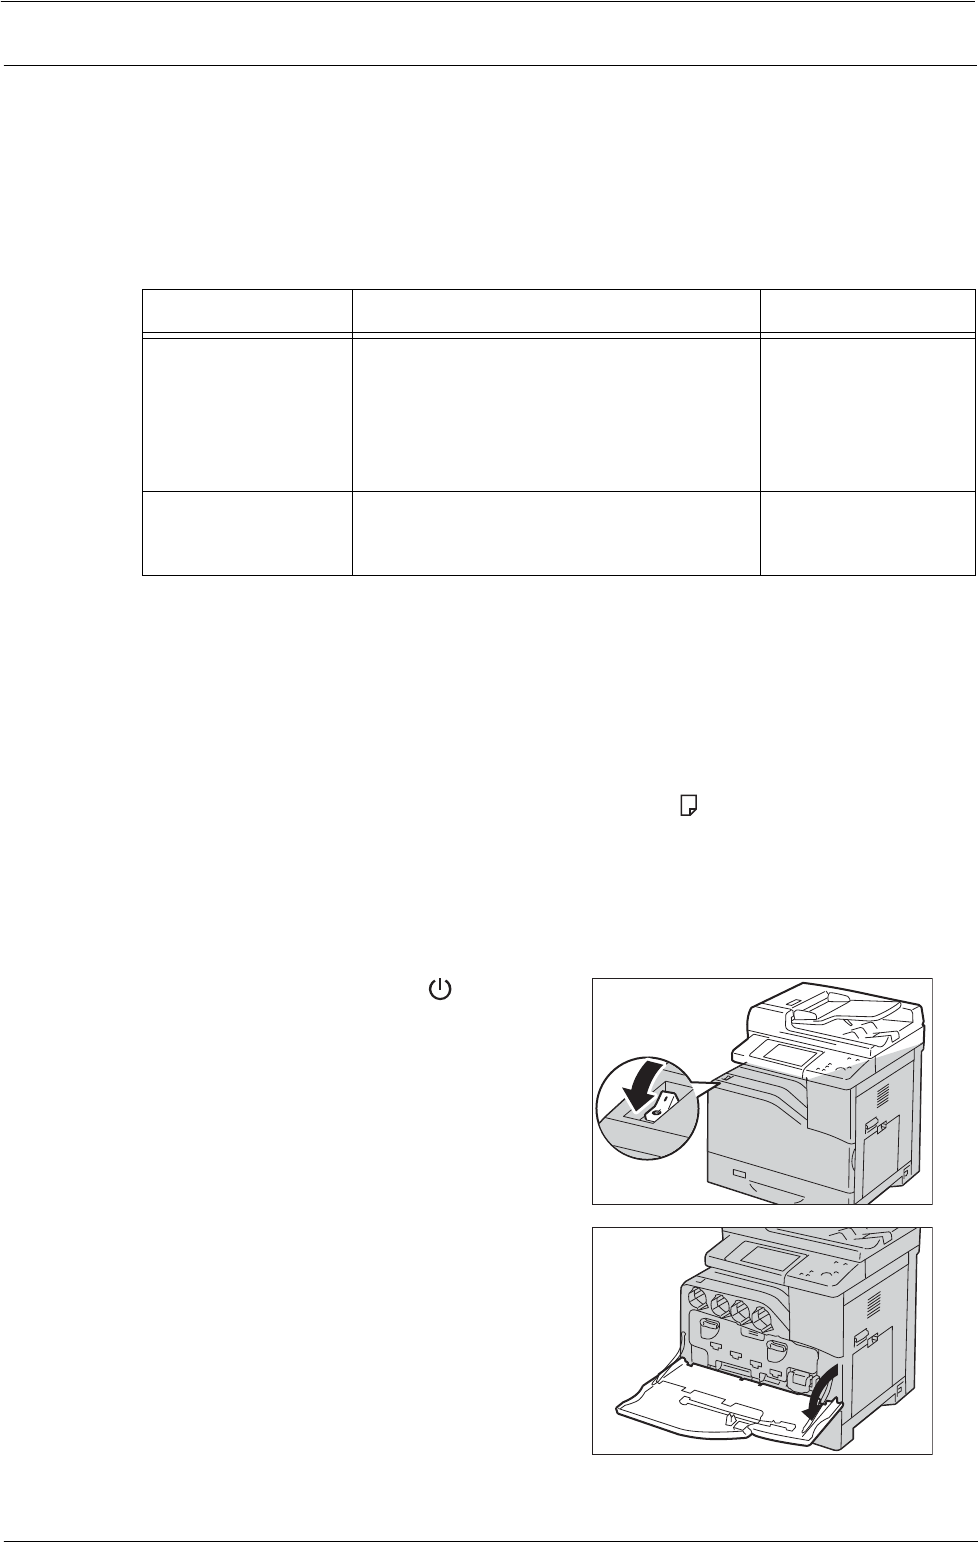
1
Make sure that the <Data> indicator light is off and there are no jobs currently in process.
2
Press the power switch to the [ ] position to
switch the power off.
3
Open the front cover.
223
