Forwarding Settings
10-37
System Manager Settings
10
● If you select [Address Book], and Access Number Management is
set to 'Off', and the destination is not stored with an access number
or in a private address book:
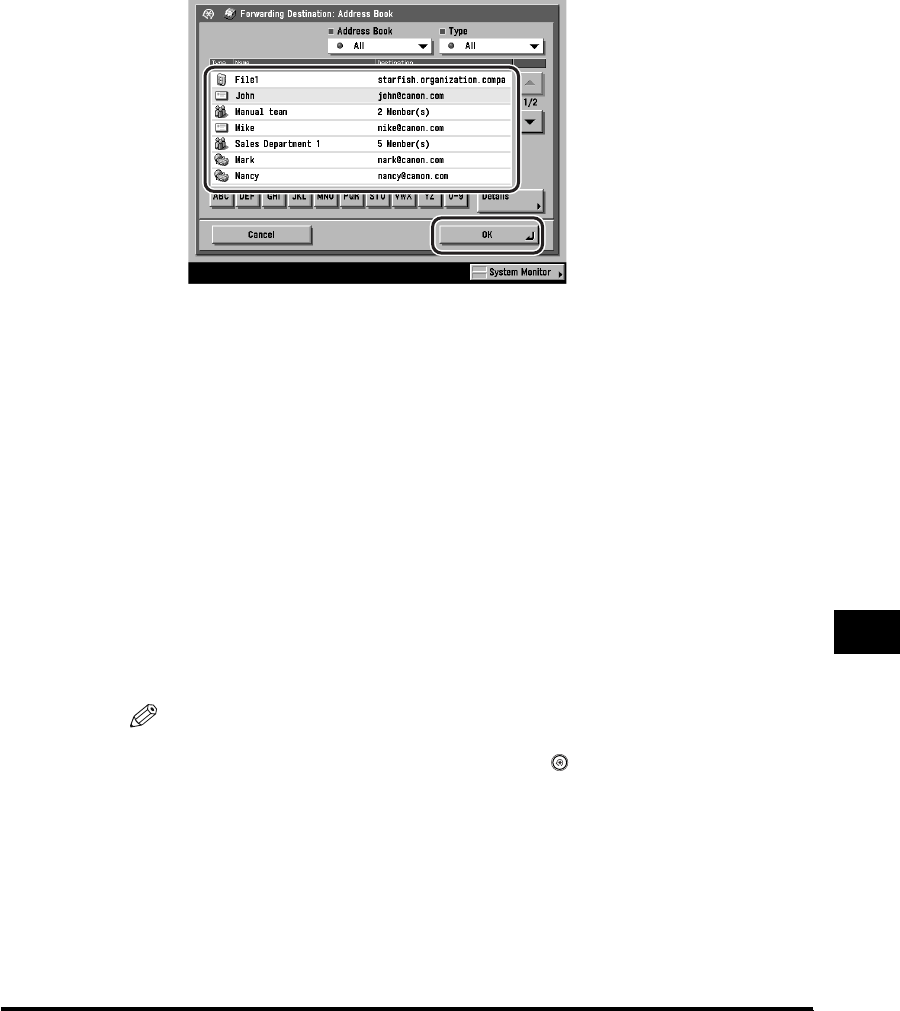
❑ Select the forwarding destination ➞ press [OK].
You cannot select multiple destinations. To forward to multiple destinations,
select a group address.
Press the alphabet keys (e.g., [ABC]) to display the range of entries. Press the
same key again to return to the full address list.
If the desired destination is not displayed, press [▼] or [▲] to scroll to the
desired destination.
You can restrict the type of destinations displayed in the results list by
pressing the Type drop-down list.
Press the Address Book drop-down list to display a list of subaddress books
(subaddress books 1 to 10, or one-touch buttons). Subaddress books
categorize the addresses stored in the Address Book. Select one of these
subaddress books to limit the display of destinations.
You can also specify a destination by searching through the directory listings
on a server on a network using LDAP. (See "Using a Server," on p. 2-38.)
If the optional Super G3 FAX Board is installed, you can also specify fax
numbers as forwarding destination.
NOTE
•
To display [Access Number], set Access Number Management to 'On'. To access
the Access Number Management setting, press (Additional Functions) ➞
[System Settings] ➞ [Manage/Access to Address Book] ➞ [Access Number
Management]. (See "Manage/Access to Address Book," on p. 10-22.)
•
To cancel a selected destination, select the destination again.
•
To view the detailed information of a selected destination, select the destination ➞
press [Details].
•
To be able to select a forwarding destination, it is necessary to register destinations
in the Address Book beforehand. (See "Storing New Addresses," on p. 9-5.)


