


Configuring LPD Printers 14-5
Configuring LPD
Configuring LPD
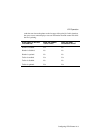
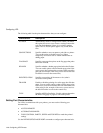
Configuring Remote Hosts
Remote network printing using LPR/LPD requires that you set up the host system
correctly. The following table describes the setup requirements for specific types of
hosts:
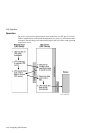
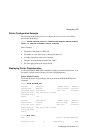
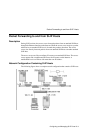
Associating a Printer With a Port
To allow remote network printing with LPD, associate a printer with one or more ports.
This is similar to defining a Telnet or TCP listener; however, instead of specifying a
port number, you specify a printer name. The printer name must be unique on the
network. You can associate the printer with a single port or you configure it to be
shared across multiple ports. This allows you to assign a single name to a collection of
similar printers.
Use the DEFINE/SET/CHANGE PRINTER command to associate a printer with a
port and configure print characteristics.
If Printing From
This Host:
Then:
UNIX Create an entry in the
/etc/printcap
file that includes
the name of the remote printer and the IP address of the
access server (the LPD server). Refer to your system’s
LPR/LPD documentation for details.
Users must convert files to either ASCII text or PostScript
format before printing files.
Windows NT
1)
Install a TCP/IP printing service.
2)
Install a printer (use the Control Panel).
3)
Choose an appropriate print driver for the printer.
4)
Assign the LPR port that the TCP/IP printing service
creates to the printer. This causes the system to prompt
the user to enter the LPD server’s IP address and
remote printer name.
VMS UCX
1)
Install the UCX software.
2)
Run UCX$LPRSETUP.EXE to set up the LPR printer.
3)
Follow the prompts to set up the printer.