17
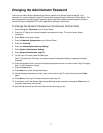
Changing the Administrator Password
There are two Administrator Passwords that control access to the Device's feature settings. One
password is a numeric password (login ID) that controls access through the Device's Control Panel. The
second password is an alphanumeric password (pass code) that controls access through the Device's
Internet Services (embedded HTTP server application residing in the Device).
To Change the Numeric Password on the Device's Control Panel
1. Press the Log In / Out button on the Control Panel.
2. Press the "1" key on the numeric keypad five consecutive times. This is the factory default
"password."
3. Press Enter on the touch screen.
4. Press the Machine Status button on the Control Panel.
5. Press the Tools tab.
6. Press the Authentication/Security Settings.
7. Press System Administrator Settings.
8. Press System Administrator Login ID.
9. On the Login ID screen, select the On button.
Note: If you select the Off button, you cannot access the password setting or password changing
functions.
10. Press the keyboard button, and use the displayed keyboard to enter in a new numeric Login ID ranging
from 1 to 32 characters in length.
11. Press the Save button.
12. Press Next, then press the keyboard button.
13. Use the displayed keyboard to enter in your new numeric Login ID a second time and press Save
again.
14. Press Save on the Login ID screen to save the new Login ID.
15. If necessary, to exit the System Administrator Settings screen, press the rectangular Close button in
the upper right corner of the screen.
16. Wait several seconds and the Auto Clear service should log you out.


