45
AS400 Printing
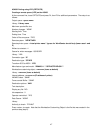
AS400 Raw TCP/IP Printing to Port 9100 (CRTDEVPRT)
Purpose
This is the procedure to set up printing to a multifunction device from an AS/400 using the SNMP drivers.
Assumptions
This procedure is intended for users familiar with the AS/400 system, especially those experienced with
printing in an AS/400 environment.
The AS/400 must run V4R5 of OS/400 so that the SNMP drivers are present (or V4R3/V4R4 with the most
current PTFs installed).
The multifunction device must have port 9100 enabled.
Procedures
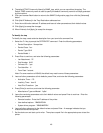
To enable port 9100
1. Open your Web browser and enter the TCP/IP address of the machine in the Address or Location field.
Press [Enter].
2. Click the [Properties] tab.
3. Click the symbol to the left of [Connectivity].
4. Click the symbol to the left of [Protocols].
5. Select [Raw TCP/IP Printing] in the directory tree.
6. Ensure the [Enabled] box is checked to enable Raw TCP/IP Printing.
7. Leave the [TCP Port Number] set to 9100 for Port 1.
8. Leave the [Bidirectional] and [Maximum Connections] settings at their default values.
9. Set the [End of Job Timeout] to the number of seconds to wait before processing a job without an End
Of Job indicator.
10. Leave the [PDL Switching] Enabled box at its default value.
11. Click [Apply] to accept the changes, [Undo] to return the settings to their previous values, or [Default
All] to enter printer defaults for all settings (recommended). NOTE: The settings are not applied until
you restart the machine.
12. Click the [Status Tab] link.
13. Click the [Reboot Machine] button and click [OK] to reboot the machine. The network controller takes
approximately 5 minutes to reboot and network connectivity will be unavailable during this time.
To create an SNMP trap
1. Open your Web browser and enter the TCP/IP address of the machine in the Address or Location field.
Press [Enter].
2. Click the [Properties] tab.
3. Click the symbol to the left of [Connectivity].
4. Click the symbol to the left of [Protocols].
5. Select [SNMP] in the directory tree. You may be prompted for the current tools administrator user
name and password. The default is [admin] and [1111]. Click [OK].
6. Check the [Enable] box to enable the protocol.
7. To edit SNMP properties click [Edit].


