


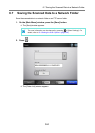
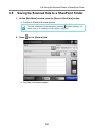
6.7 Saving the Scanned Data to a Network Folder
346
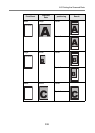
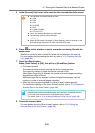
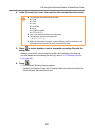
5. In the [Save as] field, enter a file name for the scanned data to be saved.
6. Press to select whether or not to overwrite an existing file with the
same name.
Whether or not the file was successfully saved can be checked in the user log.
For more details about accessing the user log, refer to "6.12 Checking the User
Log" (page 402).
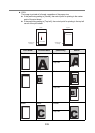
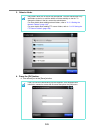
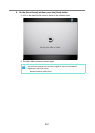
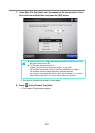
7. Press the [Scan] button.
When [Scan Viewer] is [Off], this will be a [Scan&Save] button.
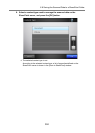
D The scanning starts.
The scanning status and scan settings are shown during the scan.
The maximum number of pages that can be scanned is 999.
When [Blank Page Skip] is enabled, the number of scanned pages excluding
skipped blank pages is shown.
Additional pages can be scanned in place of skipped blank pages, until the
maximum number of scanned pages is reached.
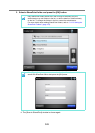
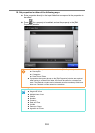
D When the scanning has completed, the [Scan Viewer] window appears.
For details about editing on the [Scan Viewer] window, refer to "6.11 Editing the
Scanned Data in the Scan Viewer" (page 398).
8. Check the scanned data.
For more details about the [Scan Viewer] window, refer to "6.11 Editing the
Scanned Data in the Scan Viewer" (page 398).
z The following file names cannot be used:
z CON
z PRN
z AUX
z CLOCK$
z NUL
z COM0 to COM9
z LPT0 to LPT9
z \ and / are used as delimiters in a folder path.
z The following symbols cannot be used.
: * ? " < > |
z When the file format is changed in [Scan Settings], the file name set on the
[File Names (Save)] window is reset in the [Save As] field.
If the [Scan&Save] button is selected (when [Scan Viewer] is [Off]), the
scanned data is saved immediately after the scanning is completed, and the
LCD touch panel screen returns to the [Main Menu] window.
For details, refer to "6.10 Enabling/Disabling the Scan Viewer" (page 395).