


6.8 Saving the Scanned Data to a SharePoint Folder
354
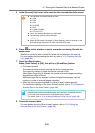
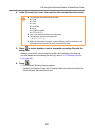
11. Press the [Scan] button.
When [Scan Viewer] is [Off], this will be a [Scan&Save] button.
D The scanning starts.
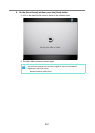
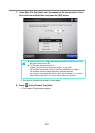
The scanning status and scan settings are shown during the scan.
The maximum number of pages that can be scanned is 999.
When [Blank Page Skip] is enabled, the number of scanned pages excluding
skipped blank pages is shown.
Additional pages can be scanned in place of skipped blank pages, until the
maximum number of scanned pages is reached.
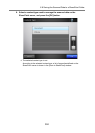
D When the scanning has completed, the [Scan Viewer] window appears.
For details about editing on the [Scan Viewer] window, refer to "6.11 Editing the
Scanned Data in the Scan Viewer" (page 398).
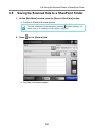
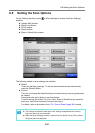
12. Check the scanned data.
For more details about the [Scan Viewer] window, refer to "6.11 Editing the
Scanned Data in the Scan Viewer" (page 398).
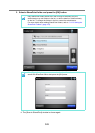
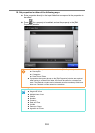
13. On the [Scan Viewer] window, press the [Save] button.
D A file in the specified file format is saved in the selected SharePoint folder.
If the [Scan&Save] button is selected (when [Scan Viewer] is [Off]), the
scanned data is saved immediately after the scanning is completed, and the
LCD touch panel screen returns to the [Main Menu] window.
For details, refer to "6.10 Enabling/Disabling the Scan Viewer" (page 395).
z When a file is overwritten, the properties of the existing file are replaced by
those of the new file.
z When multiple files are saved in TIFF or JPEG format, identical properties
are set to all the files.
z If required items other than [Single line of text] or [Multiple lines of text] are
set for the properties of the specified folder content types, files saved in the
SharePoint folder will be checked out. To change the checkout status, enter
values for the required items via a Web browser, and then check in the files.