


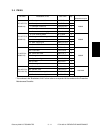
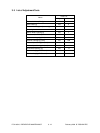
FC-210/310 PREVENTIVE MAINTENANCE 3- 10 February 2002 © TOSHIBA TEC
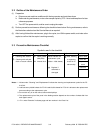
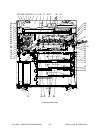
*3 Cleaning blade
If poor cleaning has occurred due to such causes as adhesion of paper dust, etc. prior to the specified
number of printouts for replacement, replace the cleaning blade as required because the blade edge
may have been damaged.
*4 Recovery blade
If the blade edge has been marred, replace the blade regardless of the number of printouts that have
been made so far.
*5 Ozone filter
If the ozone filter is heavily dirty, replace it.
*6 Main charger case and charger wire
To clean the inside of the main charger case and the charger wire, use a cloth which should be soaked
in water and then wrung lightly.
*7 Developer unit and cleaner unit
Check if the outside surfaces including the bottom surfaces are dirty, and clean if necessary.
*8 Developer material
When the developer material is replaced, be sure to perform "automatic adjustment of the auto-
toner sensor" (adjustment mode 05-200, 204, 221).
*9 Drum seal
Use a cloth which should be soaked in water and then wrung strongly to clean the front seal.
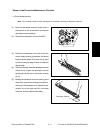
*10 Separation fingers
Replace the finger if its tip is damaged, regardless of the specified number of printouts for replace-
ment. If toner is fused tightly on the tip, the tip may be damaged if you try to scrape the toner off
forcefully. So, replace it that is heavily dirty with toner.
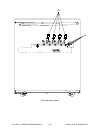
*11 Image quality sensor's area
Clean the shutter of the image quality sensor and around it. Don't touch the sensor head inside the
shutter.
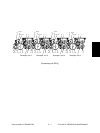
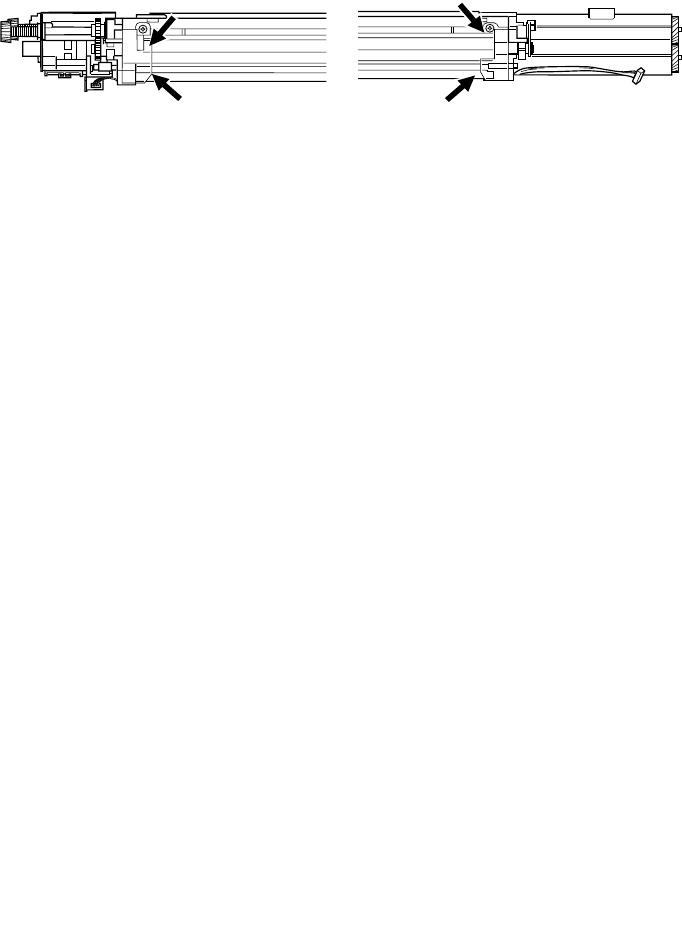
*2 Front/rear sides of developer unit
Clean off any toner accumulating on the developer sleeve ends indicated with arrows and in the area
beneath the scattered toner recovery roller.