


AT-TQ2403 Management Software User's Guide 137
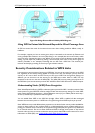
http://IPAddressOfAccessPoint
where IPAddressOfAccessPoint is the address of MyAP1.
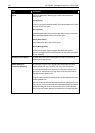
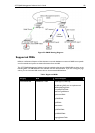
2. Navigate to the WDS tab on MyAP1 Administration Web pages.
The MAC address for MyAP1 (the access point you are curr
ently viewing) will show as the Local
Address at the top of the page.
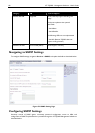
3. Conf
igure a WDS interface for data exchange with MyAP2.
Start by entering the MAC address for MyAP2 as the "Remote Address" and fill in the rest of the
fields to specify the network (guest or internal), security, and so on. Save the settings (click
Update).
4. Navigate to the radio settings on the Administration Web pages (Manage > Radio) to verify or
set the mode and the radio channel on which you want MyAP1 to broadcast.
Remember that the two access points participating in the link, MyAP1 and MyAP2, must be set to
the same Mode and be transmitting on the same channel.
For our example, let’s say we’re using IEEE 802.11b Mode and broadcasting on Channel 6. (We’d
choose Mode and Channel from the drop-down menus on the Radio tab.)
5. Now repeat the same steps for MyAP2:
Open Administration Web pages for MyAP2 by using MyAP2’s IP address in a URL.
Navigate to the WDS tab on MyAP2 Administration Web pages. (MyAP2’s MAC address
will show as the "Local Address".)
Configure a WDS interface for data exchange with MyAP1, starting with the MAC address
for MyAP1.
Navigate to the radio settings for MyAP2 to verify that it is using the same mode and
broadcasting on the same channel as MyAP1. (For our example Mode is 802.11b and the
channel is 6.)
Be sure to save the settings by clicking Update.
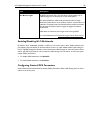
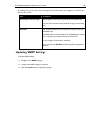
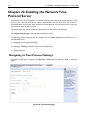
Updating Settings
To update WDS settings:
1. Navigate to the WDS tab page.
2. Configure the WDS settings as required.
3. Click the Update button to apply the changes.