


5-11
SCANNER/INTERNET FAX
Contents
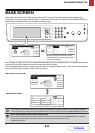
(11) [File Name] key
Touch this key to store or change a file name. A file name
previously stored in the Web pages can also be changed.
(12) [Fax Receive] key
Touch this key to receive an Internet fax manually.
☞ MANUALLY RECEIVING INTERNET FAXES (page
5-105)
(13) key
When "Hold Setting for Received Data Print" is enabled,
this appears when a fax has been received. Touch this
key to open a password entry screen. Enter the set
password to print the received fax.
☞ PRINTING A PASSWORD-PROTECTED FAX (Hold
Setting For Received Data Print) (page 5-106)
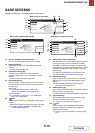
Customizing displayed keys
Special mode keys and other keys can be displayed in the base screen. Set these keys to functions that you frequently
use to access the functions with a single touch. The customized keys are configured using "Customize Key Setting" in
the Web pages. The following keys appear by factory default:
• [Special Modes] key
Touch this to use a special mode. This is the same key as the [Special Modes] key that appears when the [Job Detail
Settings] key is touched.
• [File] key, [Quick File] key*
Touch either of these keys to use the File function or Quick File function of document filing mode.
* Does not appear in the base screen of USB memory mode.
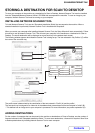
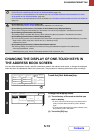
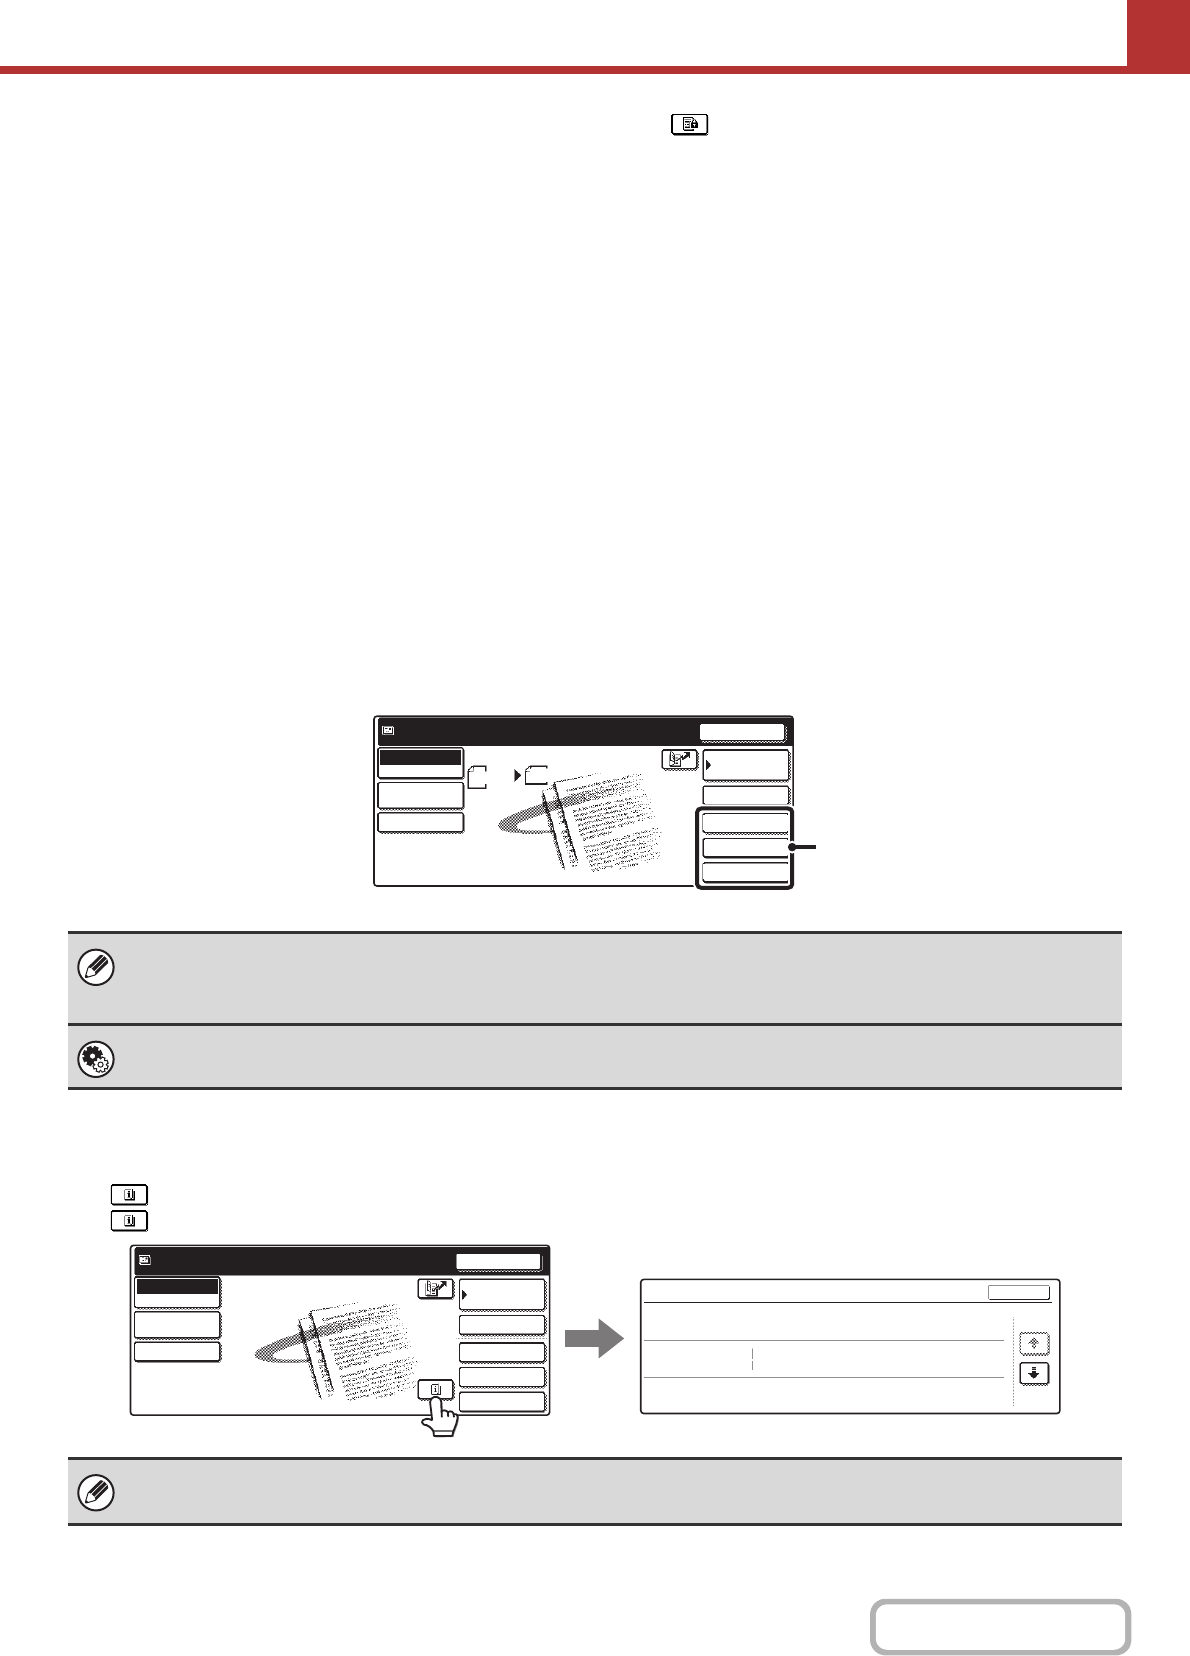
Example: When "Dual Page Scan", "Erase", and "Address Review" are assigned to the customized keys
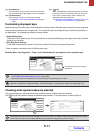
Checking what special modes are selected
The key appears in the base screen when a special mode or 2-sided scanning is selected.
The key can be touched to display the selected special modes. To close the screen, touch the [OK] key.
• Displaying a program key in the base screen will enable you to retrieve the program by simply touching the key.
☞STORING SCAN OPERATIONS (Programs) (page 5-66)
• The functions that can be selected for the customized keys vary depending on the mode.
System Settings (Administrator): Customize Key Setting
Registration is performed in [System Settings] - [Operation Settings] - "Customize Key Setting" in the Web page menu.
The special mode settings cannot be changed from the review screen. To change a setting, touch the [OK] key to close the
review screen and then touch the [Special Modes] key and select the setting that you wish to change.
Address Review
Dual Page Scan
Erase
Address Entry
Resend
Scan
A4
Send
Address Book
Scan
Mode Switch
Send Settings
Ready to send.
Job Detail
Settings
Auto
These three keys can be changed
as desired.
Quick File
File
Special Modes
Address Entry
Resend
Address Book
Scan
Mode Switch
Send Settings
Ready to send.
Function Review
OK
1/3
Edge:10mm
Centre:10mm
Day of the Week:Monday
Time:21:30
:
:
On
:
Timer
Erase
Job
Build
Job Detail
Settings