7-106
SYSTEM SETTINGS
Contents
Port Switching Method
This setting is used to select when port switching takes
place.
• Switch at End of Job:
The port changes to auto selection when printing
ends.
• Switch after I/O Timeout:
When the time set in "I/O Timeout" (page 7-105)
elapses, the port changes to auto selection.
Select one of the keys and touch the [OK] key.
Colour Adjustments
This is used to adjust greyscale and colour balance.
Touch [Printer Settings] key and touch the [Colour Adjustments] key and configure the settings.
Auto Colour Calibration
This is used to perform automatic colour correction when
the colour in colour copies is off. The machine prints a
test patch, the test patch is scanned, and the colour is
automatically corrected.
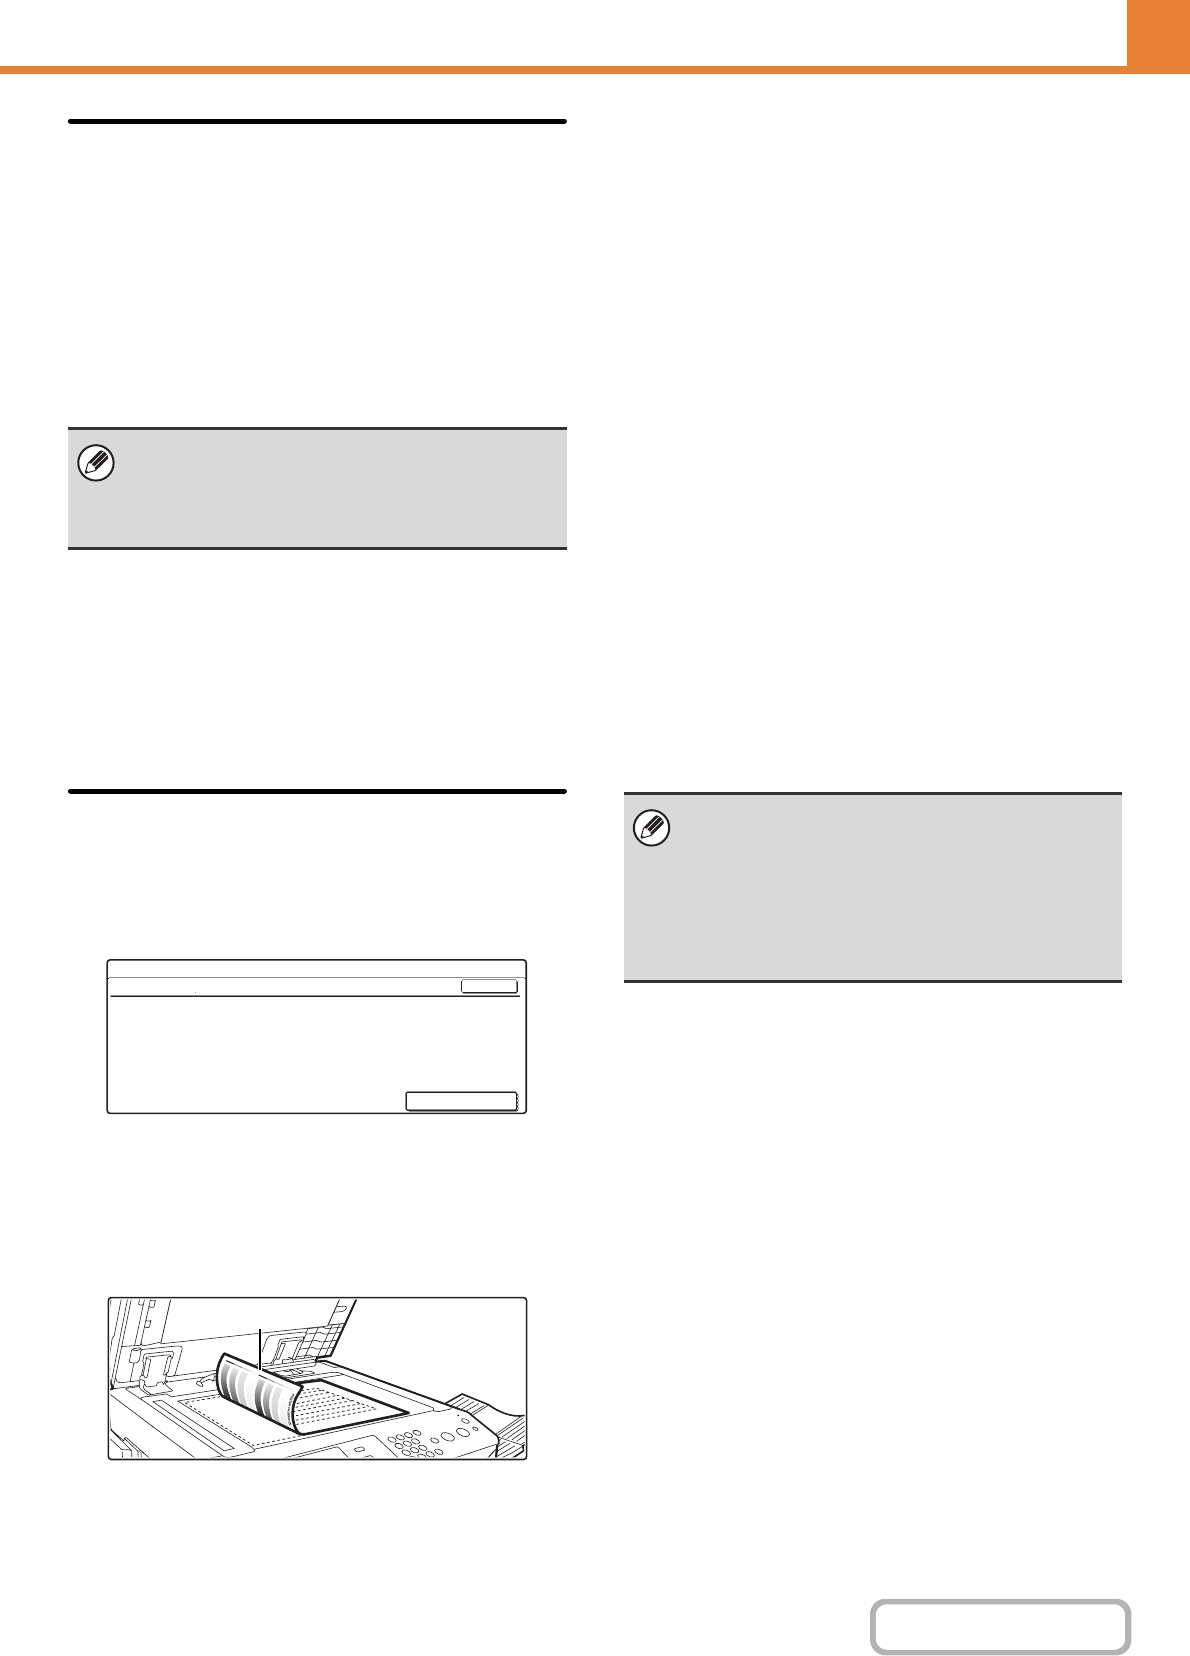
After the [Execute] key is touched and a test patch is
printed, a message appears prompting you to begin
automatic calibration. Place the test patch on the
document glass as shown below so that the narrow line
of one-side of the paper is on the left and touch the
[Execute] key.
Lay copy paper (about five sheets) that is the same size
as the test patch on top of the placed test patch, and
gently close the automatic document feeder.
The following two print ports are available on the
machine:
• USB port
• Network port
System Settings
Auto Colour Calibration
Use 11"x17" or A3 paper for this adjustment.
Press [Execute] to print the test patch.
OK
Execute
Narrow line
• Before executing Auto Colour Calibration, check to
see if the registration adjustment is correct. If the
registration adjustment is not correct, perform
"Registration Adjustment" (page 7-96).
• If the colour is still off after performing Auto Colour
Calibration, repeating Auto Colour Calibration once
again may improve the colour.


