


1-8
BEFORE USING THE MACHINE
Contents
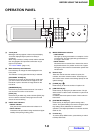
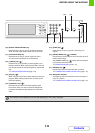
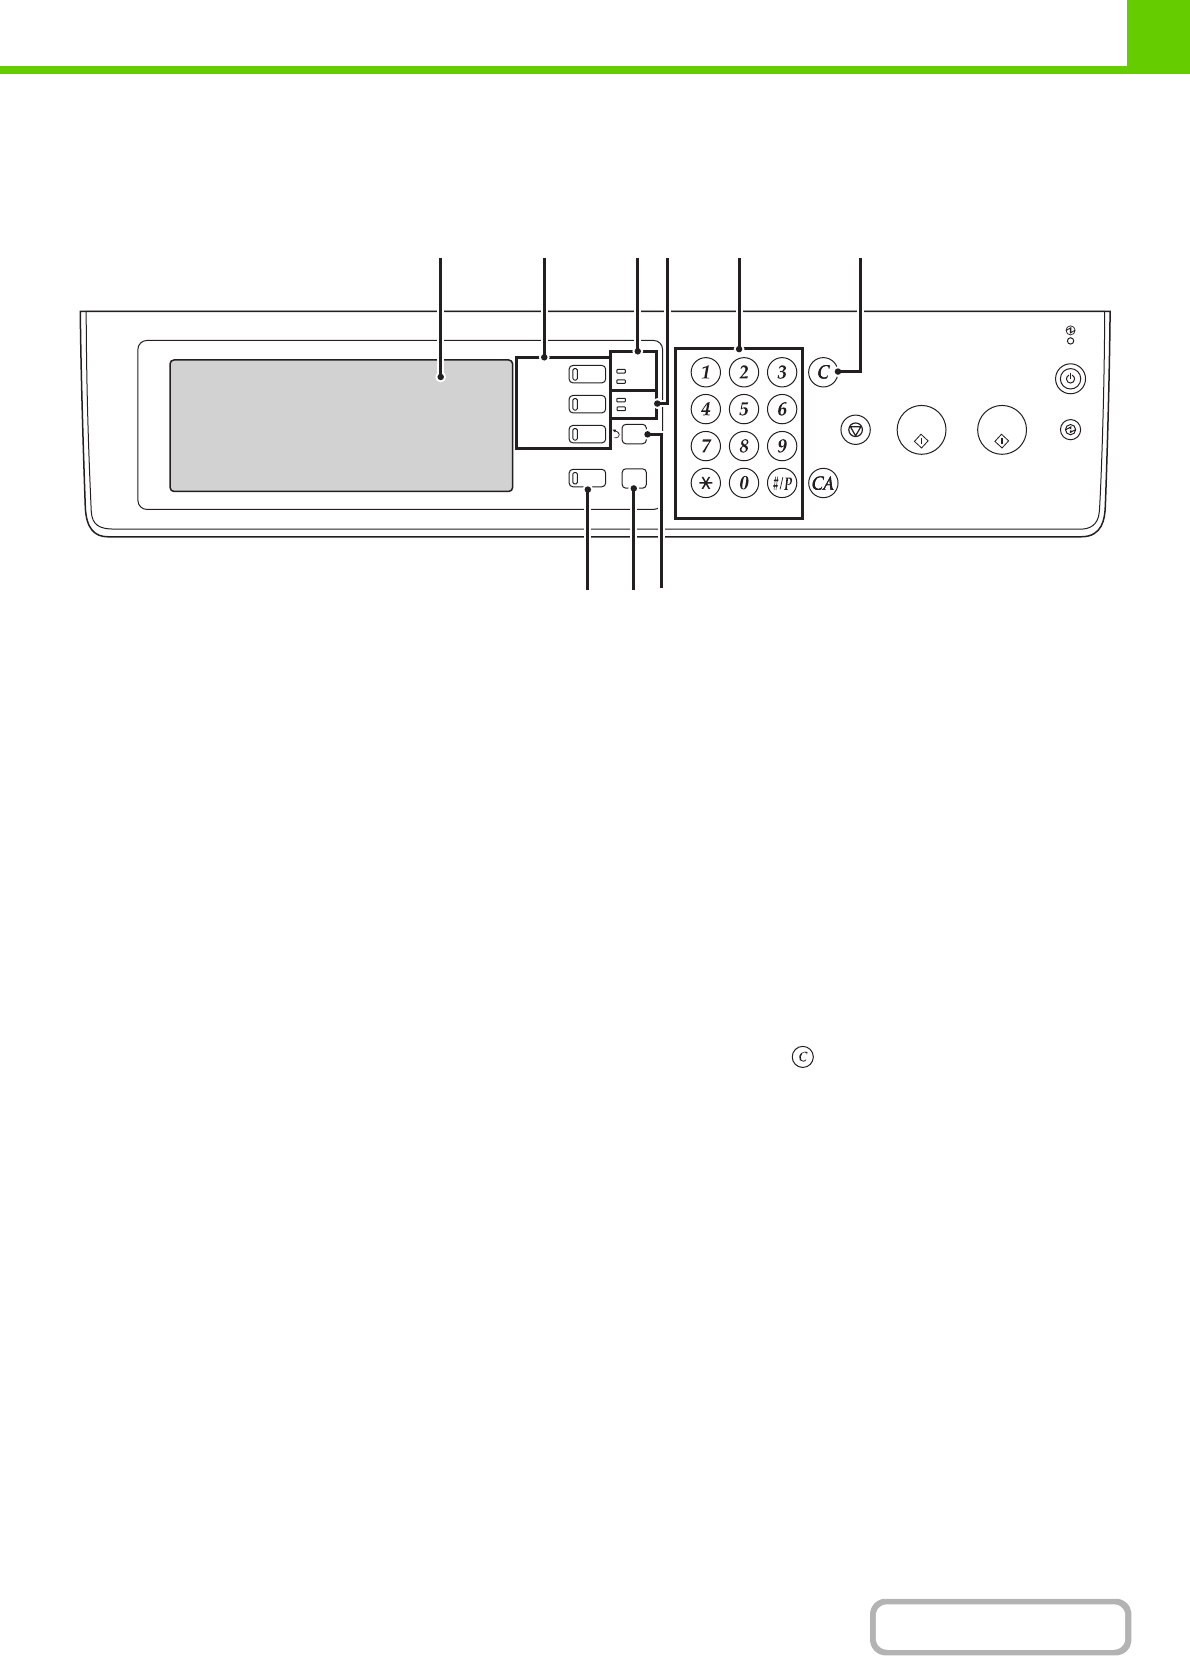
OPERATION PANEL
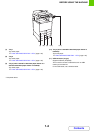
(1) Touch panel
Messages and keys appear in the touch panel display.
Touch the displayed keys to perform a variety of
operations.
When a key is touched, a beep sounds and the selected
item is highlighted. This provides confirmation as you
perform an operation.
☞ TOUCH PANEL (page 1-10)
(2) Mode select keys and indicators
Use these keys to change the mode displayed in the
touch panel.
The indicator of a key lights when the key is selected.
[DOCUMENT FILING] key
Press this key to switch to document filing mode when
you wish to store a document as an image file on the
hard drive or print or transmit an image stored on the
hard drive.
[IMAGE SEND] key
Press this key to select network scanner / fax mode to
use the scanner function or fax function.
[COPY] key
Press this key to select copy mode. Hold the [COPY] key
down to view the machine's total page use count and
amount of toner remaining.
(3) PRINT mode indicators
• READY indicator
Print jobs can be received when this indicator is lit.
• DATA indicator
This blinks while print data is being received and lights
steadily while printing is taking place.
(4) IMAGE SEND mode indicators
• LINE indicator
This lights up during transmission or reception of a fax
or Internet fax. This also lights during transmission of
an image in scan mode.
• DATA indicator
This blinks when a received fax or Internet fax cannot
be printed because of a problem such as out of paper.
This lights up when there is a transmission job that has
not been sent.
(5) Numeric keys
These are used to enter the number of copies, fax
numbers, and other numerical values. These keys are
also used to enter numeric value settings (except for the
system settings).
(6) [CLEAR] key ( )
Press this key to return the number of copies to "0".
(7) [JOB STATUS] key
Press this key to display the job status screen. The job
status screen is used to check information on jobs and to
cancel jobs.
For details, see the chapters for each of the functions in
this manual.
(8) [SYSTEM SETTINGS] key
Press this key to display the system settings menu
screen. The system settings are used to configure paper
tray settings, store addresses for transmission
operations, and adjust parameters to make the machine
easier to use.
(9) Function key
To use the Sharp OSA function, press this key to switch
to Sharp OSA mode.
LOGOUT
JOB STATUS
IMAGE SEND
DOCUMENT
FILING
COPY
PRINT
READY
DATA
DATA
LINE
SYSTEM
SETTINGS
(5)(3) (6)(4)(2)(1)
(8) (9)(7)