


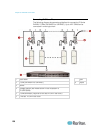

Chapter 8: P2ZCIMs and Z-CIMs
132
b. Edit the default name and press Enter—the highlight will turn
green as you begin to type.
c. Press S to save the change, or press Esc to exit without saving.
8. Press F2 to go to the Selection Menu, select the tiered P2ZCIM
device, and press Enter to validate that the second-tier P2ZCIM is
properly configured.
To name the server channel on the Tiered Selection menu of
P2ZCIM
1. When the OSUI is on the screen, press F5 to go to the
Administration Menu.
2. Select the Channel Configuration submenu, and press Enter.
3. Select the P2ZCIM device channel.
4. Press G to bring up a Channel Configuration submenu for the CIM
chain.
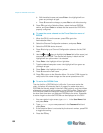
5. Use the
and keys to highlight the Name field of the server just
connected via P2ZCIM. The channel will display in black and the
highlight will turn yellow when it is selected.
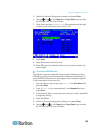
6. Press Enter—the highlight will turn light blue.
7. Type the desired computer name—the highlight will turn green as
you begin to type.
8. Press Enter—the highlight will turn yellow.
9. Press S to save the new name.
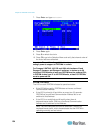
10. Press F2 to return to the Selection Menu. Go to the Z-CIM channel to
verify both of the name change and the server operation are OK.
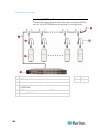
To resize the P2ZCIM Chain
The size limit for a P2ZCIM chain is 42 units. If you never resize the
chain, it displays 42 channels (that is, 6 pages) no matter how many
P2ZCIMs are actually added in the chain. After resizing, only the number
of channels you specify will be shown on the OSUI screen. Resizing the
P2ZCIM chain does not change the name of the chain. It changes only
the size. Next time when you add new P2ZCIMs to the chain, remember
to resize it again so the new P2ZCIMs can be displayed on the OSUI.
1. At a user-station Login screen, type admin in the User Name field
and press Enter.
2. Type raritan or your new password in the Password field and
press Enter.
3. If the Selection Menu is not sorted by the channel number, press F12
to toggle the sorting.
4. Press the F5 key.