Control Panel
7
1
14. Quick Dial keys
Press to select the registered destination
with a single touch, or to enter letters and
symbols.
Reference
For more information, see General
Settings Guide.
Note
❒ You can register up to 16 destinations
using the Quick Dial keys.
15. {
{{
{Lighter}
}}
} and {
{{
{Darker}
}}
} keys
Press to change the image density setting.
Select the image density in three incre-
ments, Lighter to Darker.
16.
{
{{
{Original Type}
}}
} key
Press to select the original type registered
with [Type 1(Text):] or [Type 2(Photo):].
When the original type is selected, the
corresponding indicator lights.
17. {
{{
{Cancel}
}}
} key
Press to cancel an operation or return to
the previous display.
18.
{
{{
{OK}
}}
} key
Press to set a selected item or an entered
numeric value.
19. Number keys
Press to enter numeric values.
20. {
{{
{Start}
}}
} key
Press to start scanning or sending.
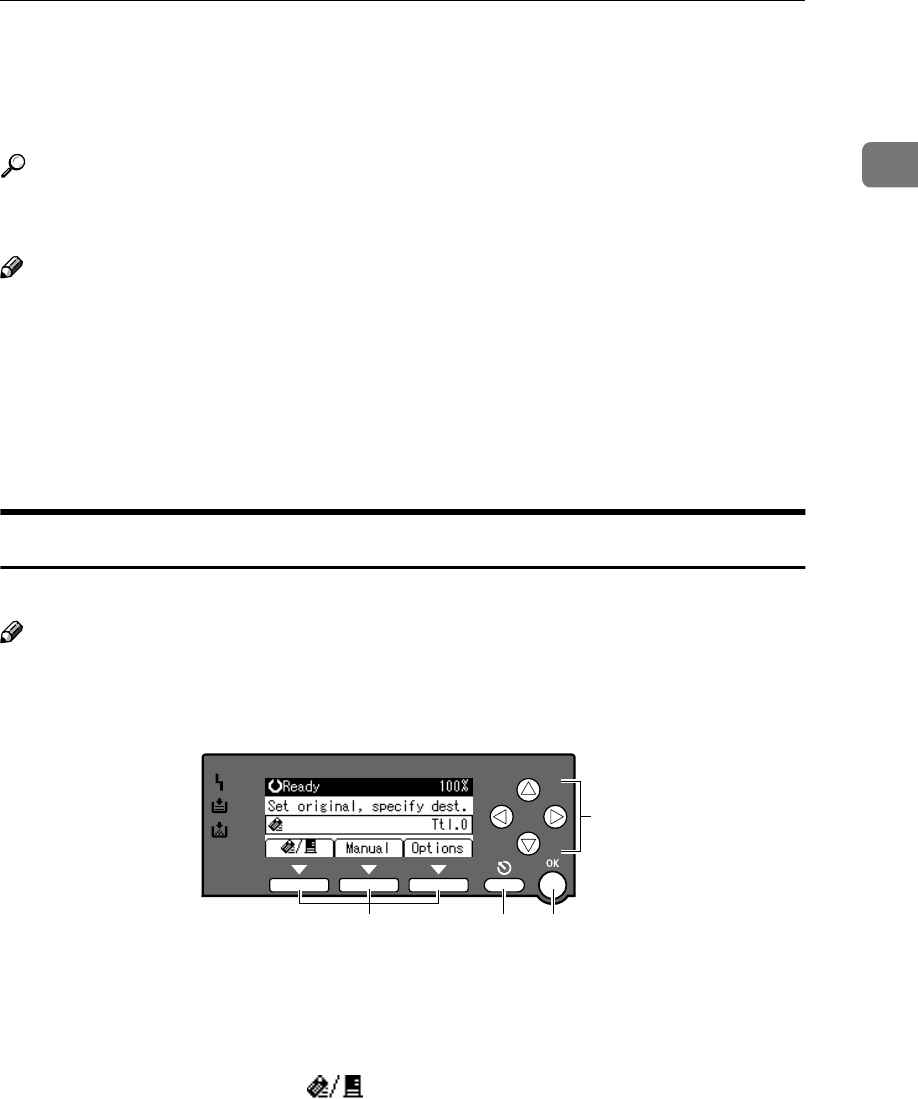
Reading the Display and Using Keys
This section explains how to read the display and use the selection key.
Note
❒ The copy screen is set as the default screen when the machine is turned on.
You can change the settings in [System Settings]. See General Settings Guide.
1. Selection keys
Correspond to items at the bottom line on
the display.
Example: The E-mail screen
• When the instruction “press []”
is given in this manual, press the left
selection key.
• When the instruction “press [
Manual
]”
is given in this manual, press the cen-
tre selection key.
• When the instruction “press [
Options
]”
is given in this manual, press the right
selection key.
2. {
{{
{Cancel}
}}
} key
Press to cancel an operation or return to
the previous display.
3. {
{{
{OK}
}}
} key
Press to set a selected item or an entered
numeric value.
4. Scroll keys
Press to move the cursor in each direc-
tion, step by step.
When the {
{{
{U
UU
U}
}}
}, {
{{
{T
TT
T}
}}
}, {
{{
{V
VV
V}
}}
}, or {
{{
{W
WW
W}
}}
} key ap-
pears in this manual, press the scroll key
of the same direction.
1 2 3
4
ABF005S


