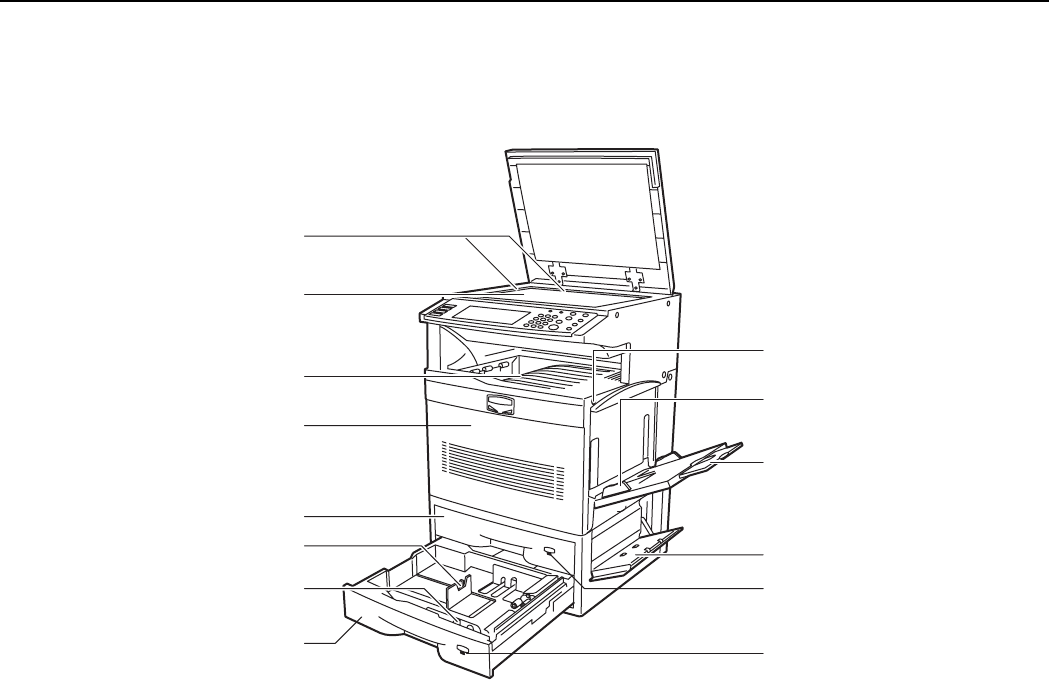
Section 2 NAMES OF PARTS
2-2
(15) Original size indicator plate
Be sure to align the original with this plate when setting an
original on the platen.
(16) Platen
Set originals here for copying. Lay originals face-down and
align them with the upper left corner of the platen (towards
the left-rear portion of the copier).
(17) Top tray
Finished copies can be ejected and stored on this tray.
(18) Front cover
Open this cover if a paper misfeed occurs inside the copier,
when you need to replace a toner container, the waste toner
box, as well as during cleaning operations.
(19) MP tray
(20) MP extension
Pull out this extension when copying onto 8
1/2" × 11" [A4R]
size paper or larger.
(21) Insert guides
Align these guides to fit the width of the paper that is to be set
on the MP tray.
(22) Drawer[Cassette] No.2
This drawer[cassette] has a storage capacity of 500 sheets of
copy paper.
(23) Duplex Unit
This unit allows you to make duplex [2-sided] copies.
(24) Paper length guide release levers
Pinch these levers and adjust the guide plate to fit the length
of the paper that is to be loaded in that drawer[cassette].
(25) Paper width guide release levers
Pinch these levers and adjust the guide plates to fit the width
of the paper that is to be loaded in that drawer[cassette].
(26) Right side drawer[cassette] cover
Open this cover if a paper misfeed occurs inside the copier.
(15)
(16)
(17)
(18)
(23)
(23)
(25)
(22)
(27)
(21)
(19)
(20)
(25)
(29)
(28)


