Section 9 TROUBLESHOOTING
9-13
2
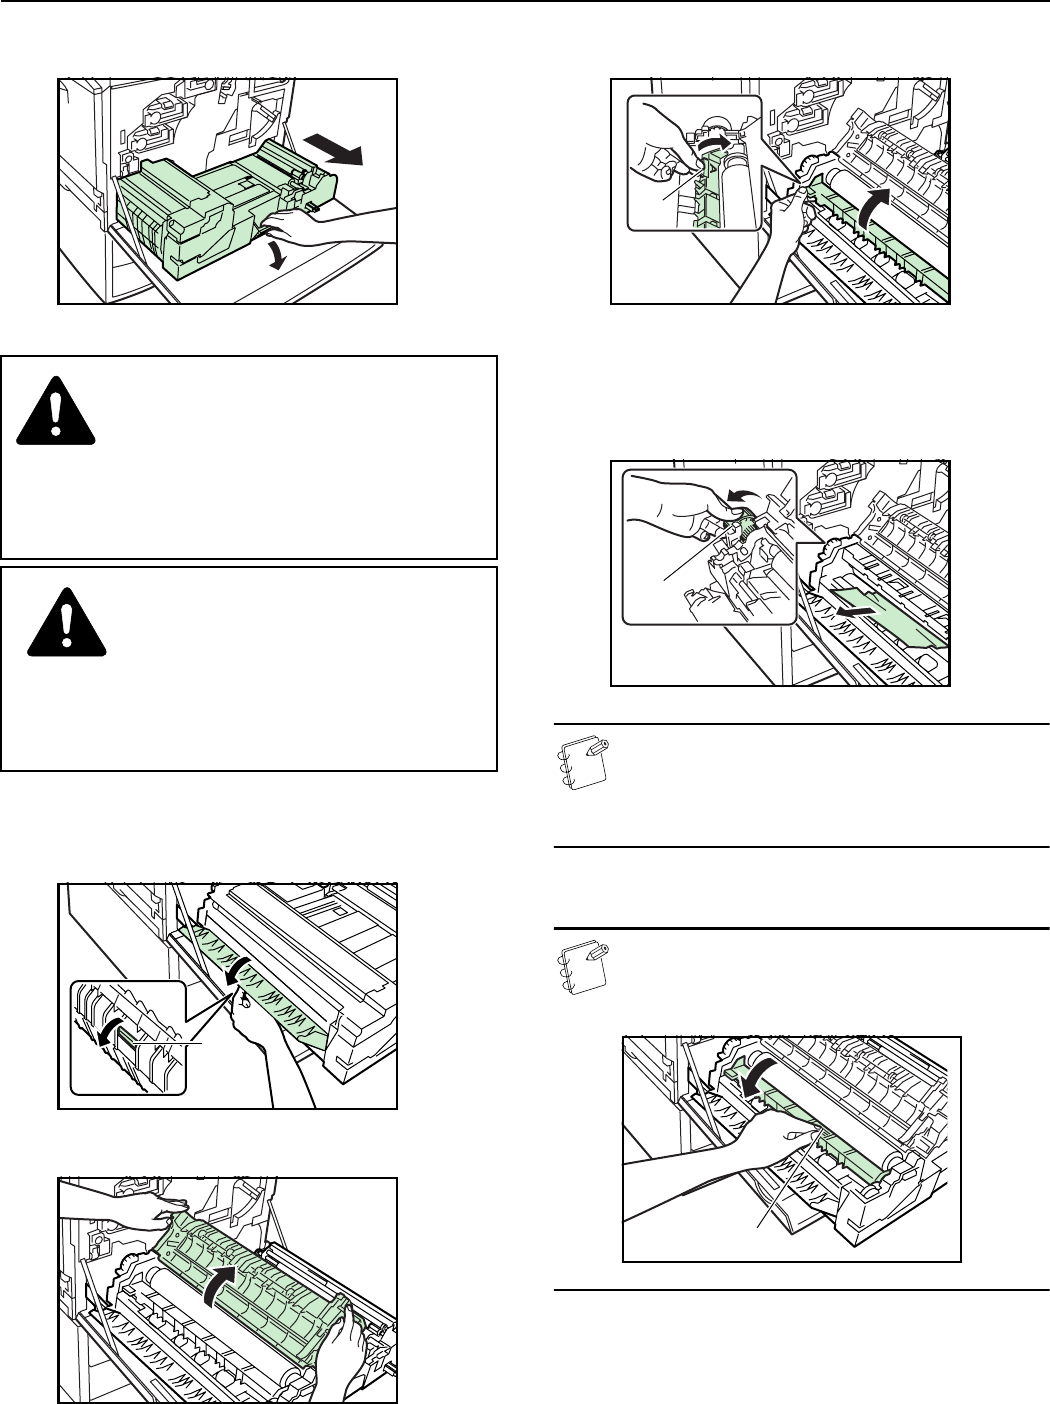
Operate the paper conveyor release lever and pull the
paper conveyor unit out towards you as far as it will go.
3
Grasp the green handle (shown as (1) in the illustration) on
the left cover to the fixing section and open that cover.
4
Open the upper cover to the fixing section.
5
Grasp the handle (marked with an “A” and shown as (2) in
the illustration) to the inner cover and open that cover.
6
Remove the jammed paper without tearing it. If the paper
is difficult to remove at all, turn the green fixing gear
(shown as (3) in the illustration) to the left. The misfed
paper will be fed out to a location that makes it easier to
remove.
NOTES
• The fixing gear will only turn in the direction indicated
in the illustration.
• If the paper does happen to tear, remove any loose
scraps from inside the copier.
7
Close all open covers.
NOTE
Be sure to hold the middle handle (marked with a “B” and
shown as (4) in the illustration) when you close the inner
cover to the fixing unit.
WARNING
High voltage is present in the charger section.
Take sufficient care when working in this area, as
there is a danger of electrical shock.
CAUTION
The copier’s fixing unit is extremely hot. Take
sufficient care when working in this area, as there
is a danger of getting burned.
(1)
(2)
(3)
(4)


