


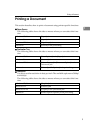


Printing a Document
7
1
Proof Print
Limitation
❒
Follow the steps below to print a document using “Proof Print”.
❒
To use this function, the optional hard disk must be installed on your printer.
Note
❒
This function is not available on computers running Windows 3.1x, Windows
NT4.0.
Windows 95/98
Note
❒
If the application has a collate option, make sure that it is not selected before
sending a print job. By default, proof print jobs are automatically collated by
the printer driver. If collate option is selected from the application print dia-
log box, more copies than intended may be printed.
A From an application, select the menu command to print. This will open the
print dialog box.
B Open the printer driver dialog.
C Click the
[
Proof Print
]
tab, and select
[
Proof Printing
]
.
D In the
[
User ID
]
box, enter your User ID using up to 8 alphanumeric charac-
ters.
Note
❒
This is used to identify the user associated with a job.
❒
"User ID" consists of up to 8 alphanumeric (a-z, A-Z, 0-9) characters.
E Click
[
OK
]
to close the Printer Properties dialog.
F Start printing from the application's print dialog box.
The proof print job is sent to the printer and one copy set is printed.
G Check the output to confirm whether the settings are OK, or not.
If the settings are OK , go to step H to print the rest of the print job.
If not, you can delete the rest of the print job.⇒ P.9 “Deleting a Proof Print File”
H Press the {
User Tools
} key of the machine's operation panel.
I Press {
4
} of the number keys.
J Select “Proof Print “ under “Main Menu” and press the
[
Enter
]
key.