Corrective Maintenance
6–12
1780R-Series Service Manual
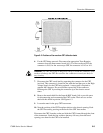
Use the following procedure to remove the Waveform HV Supply board.
1. Remove the two screws that hold the clear plastic cover in position.
2. Remove the two 1/4-inch hex-shaped posts.
WARNING. The CRT may retain a dangerous charge. Ground the anode lead
conductor to discharge the CRT. Do not allow the conductor to touch your body
or any circuitry.
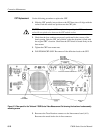
3. Unplug the connectors from J110, J140, J200, J300, and J550 on the
Waveform HV Supply board (A16). Disconnect the high voltage anode lead
at the in-line connector. Refer to step 7 in the CRT Removal procedure for
more information.
4. Remove the six screws to remove the board.
5. To re-assemble, reverse the procedure.
Use the following procedure to remove the Microprocessor board.
1. Unplug the three ribbon cable connectors from J115, J415, and J515 on the
Microprocessor board (A5).
2. Remove the four nuts that hold the REMOTE and SERIAL PORT connec-
tors to the rear panel.
3. Remove the eight screws from the circuit board.
4. Remove the board by moving the front end of the board outward and then
forward.
5. To re-assemble, reverse the procedure.
6. Perform Step 3 of the Adjustment Procedure.
Use the following procedure to remove the
1. Unplug the three ribbon cable connectors from J112, J138, and J302 on the
MPU Annex board (A10). Use the pull tabs to disengage the connectors
from J112 and J138 on the board.
2. Remove the four screws to release the board for removal.
3. To re-assemble, reverse the procedure.
Removing the Waveform
HV Supply Board
Removing the
Microprocessor (MPU)
Board
Removing the MPU Annex
Board


