472 Configuring Routing
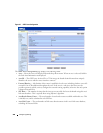
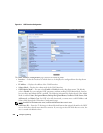
The OSPF Area Range Configuration page contains the following fields:
•
Area ID
— Select the area for which data is to be configured from the drop-down menu.
•
IP Address
— Enter the IP Address for the address range for the selected area.
•
Subnet Mask
— Enter the Subnet Mask for the address range for the selected area.
•
LSDB Type
— Select the type of Link Advertisement associated with the specified area and address
range. The default type is 'Network Summary.'
•
Advertisement
— Select Enable or Disable from the drop-down menu. If you selected Enable the
address range is advertised outside the area through a Network Summary LSA. The default is Enable.
•
Add
— Check the Add check box if you wish to add an area range.
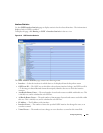
OSPF Area Range Table
•
Area ID
— Displays the OSPF area.
•
IP Address
— Displays the IP address of an address range for the area.
•
Subnet Mask
— Displays the subnet mask of an address range for the area.
•
LSDB Type
— Displays the link advertisement type for the address range and area.
•
Advertisement
— Displays the advertisement mode for the address range and area.
•
Remove
— Removes the specified area entry.
Defining an OSPF Area Range
1.
Open the
OSPF Area Range Configuration
page.
2.
Enter Area ID, IP Address, Subnet Mask, LSDB Type and Advertisement.
3.
Click the
Add
check box.
4.
Click
Apply Changes
.
The OSPF area range is defined and configured. All configured OSPF area ranges are displayed in the
table on the
OSPF Area Range Configuration
page.
Removing an OSPF Area Range Configuration
1.
Open the
OSPF Area Range Configuration
page.
2.
Select the
Remove
check box in the row of the
Area ID
to be deleted.
3.
Click
Apply Changes
.
The address range is removed from the area configuration.
OSPF Area Range Configuration CLI Command
For information about the CLI commands that perform this function, see the following chapter in the
CLI Reference Guide:
• OSPF Commands


