


Scanning in color or black and white
1 Make sure the printer is connected to a computer, and both the printer and the computer are on.
2 Load an original document faceup into the Automatic Document Feeder (ADF) or facedown on the scanner glass.
Note: Do not load postcards, photos, small items, transparencies, photo paper, or thin media (such as magazine
clippings) into the Automatic Document Feeder (ADF). Place these items on the scanner glass.
3 From the control panel, press or repeatedly until Scan is highlighted.
4 Press .
5 If your printer is connected to more than one computer:
a Press or repeatedly until the computer to which you want to scan is highlighted.
b Press .
If you set a PIN during network setup and are being asked for it:
1 Enter the PIN using and to select a digit location and and to select a value for that digit.
2 Press .
6 Wait until the printer has finished downloading the scan applications list.
7 Press or repeatedly until Color is highlighted.
8 Press or to choose Color or Black & White.
9 Press to preview the copy.
10 Press to continue adjusting the settings.
11 Repeat step 9 and step 10 as needed.
12 Press .
13 Follow the instructions on your computer screen.
Creating a PDF from a scanned item
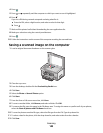
1 Load an original document facedown on the scanner glass.
2 From the desktop, double-click the Productivity Studio icon.
3 From the Welcome Screen, click Convert to PDF.
4 Select Photo, Several Photos, or Document.
5 Click Start to begin scanning.
6 Click Add Another to scan additional images, or to add an image from the Library.
7 To add or scan another image, do one of the following:
• Select Add New Scan and repeat step 3 to scan another image
or
• Select Add Photo from Library to add a previously scanned image. Select or deselect images by clicking on
them in the preview pane.
8 Select Save all images as one PDF file or Save each image as individual PDF file.
Scanning
146