


From here You can
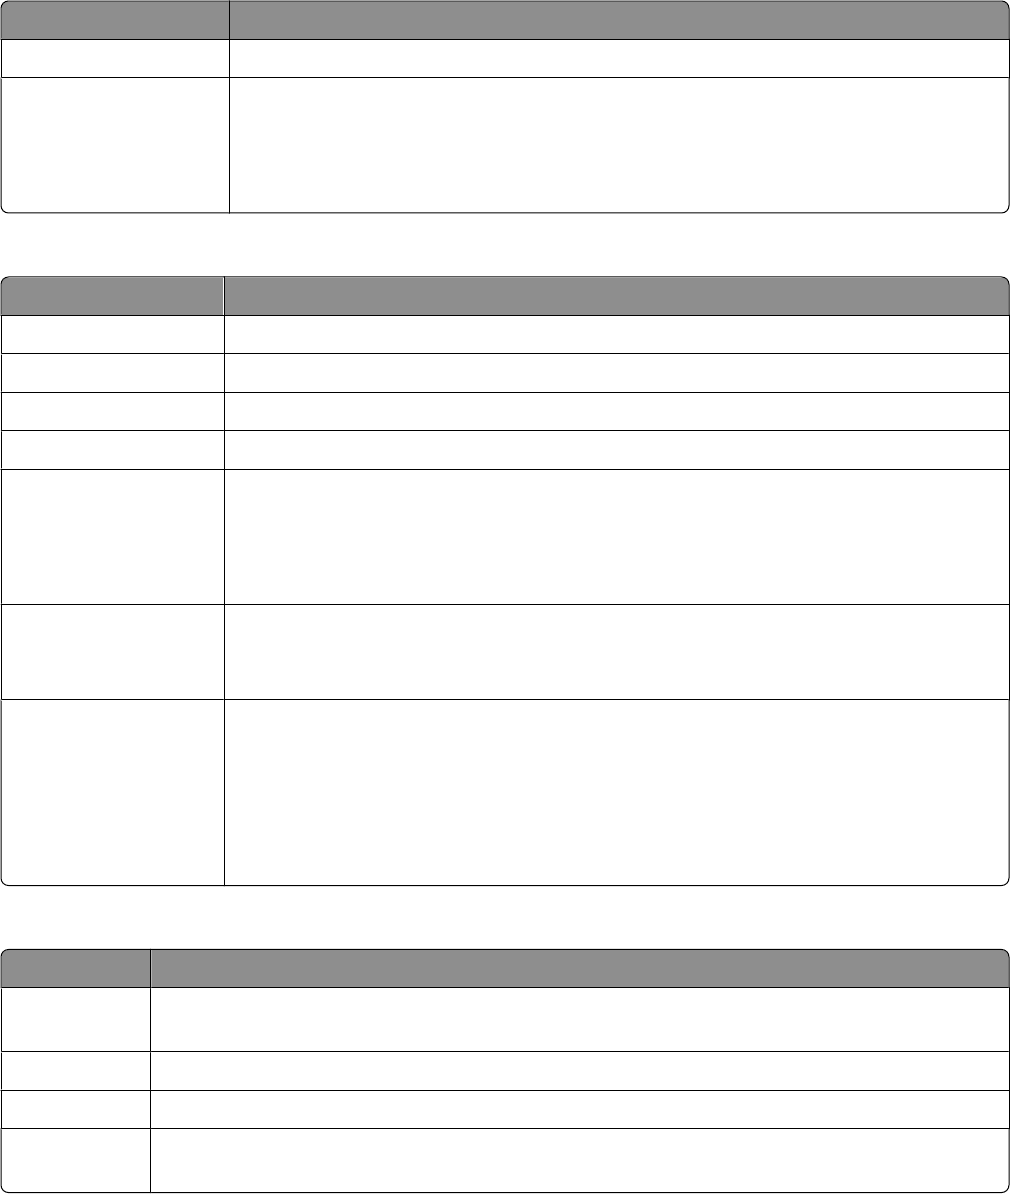
Print Fax Activity History Print a report detailing the last 40 faxes sent and received.
Confirmation Determine when to print a report of a fax transmission. You can choose to print:
• Every time a fax is sent, successfully or not
• Only if there is a transmission error
• Not at all
Understanding the Ringing and Answering menu
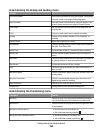
From here You can
Ring Volume Set the ring volume to off, low, or high.
Pickup On Choose to receive a fax after the first, second, third, or fifth ring.
Distinctive Ring Set the ring pattern to any ring, a single ring, a double ring, or a triple ring.
Auto Answer Schedule Specify a schedule for Auto Answer to turn on or off.
Fax Forward Choose:
• Not to forward faxes. The printer will print all received faxes.
• To print a copy of a received fax and forward the call to a number you choose.
• To Forward a received fax without printing a copy of the fax.
Manual Pickup Keycode Set the manual pickup code so you can choose to receive an incoming fax even if the
printer is set to ignore the call, such as when Auto Answer is turned off.
The default manual pickup keycode is *9*.
Caller ID Pattern Choose from one of the following patterns available based on the country or region you
selected during initial setup:
• Pattern 1 (FSK)
• Pattern 2 (DTMF)
If phones in your country use two detection patterns, call your telecommunications
company to determine its prescribed pattern.
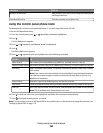
Understanding the Fax Printing menu
From here You can
If Too Big Choose to print a fax that is too big for the paper loaded in the printer by fitting it into a page, or
using two pages.
Fax Footer Choose whether or not to print identifying information at the bottom of each page of a fax.
2-Sided Print Choose to print received faxes on one or both sides of a sheet of paper.
Paper Handling Change settings related to the loading of paper in the paper tray or trays. For more information,
see “Understanding the Paper Handling menu” on page 85.
Faxing using the control panel
161