


Changing user information on a fax cover page
1 From the desktop, double-click the Productivity Studio icon.
2 From the Settings area of the Welcome Screen, click Fax History and Settings.
3 From the “I Want To” menu, click View cover pages.
4 Click Change your personal information that appears on this page.
5 Enter the correct personal information.
6 Click OK.
7 Click OK.
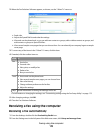
Printing fax activity reports
1 From the desktop, double-click the Productivity Studio icon.
2 From the Settings area of the Welcome Screen, click Fax History and Settings.
The Fax Solution Software appears.
3 On the toolbar, click Tools Fax History.
4 Click the Print Report button to print.
Blocking junk faxes
1 From the desktop, double-click the Productivity Studio icon.
2 From the Settings area of the Welcome Screen, click Fax History and Settings.
The Fax Solution Software appears.
3 From the “I Want To” menu, click Adjust speed dial list and other fax settings.
4 Click the Ringing and Answering tab.
5 From the “Block Faxes from particular senders/numbers” area, select Manage Blocked Faxes.
6 If you want to block faxes from senders missing a valid Caller ID, select the check box, and enable fax blocking.
7 If you want to block faxes from specific fax numbers, list them in the box provided. You can also edit this list.
8 Click OK to save the setting.
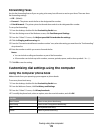
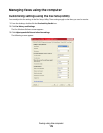
Faxing using the computer
177