


Faxing using the control panel
Sending a fax using the control panel
Sending a fax using the control panel
This is the best way to send a fax if you are faxing documents that are already printed.
1 Make sure the printer is on and is connected to a working phone line.
2 Load an original document faceup into the Automatic Document Feeder (ADF) or facedown on the scanner glass.
Note: Do not load postcards, photos, small items, transparencies, photo paper, or thin media (such as magazine
clippings) into the Automatic Document Feeder (ADF). Place these items on the scanner glass.
3 From the control panel, press or repeatedly until Fax is highlighted.
4 Press .
The Fax Mode menu appears.
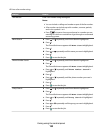
5 Enter a fax number. For more information on the methods you can use to enter a fax number, see the table that
begins with step 4 on page 153.
Notes:
• You can include a calling card number as part of the fax number.
• A fax number can include up to 64 numbers, commas, periods, and/or the symbols * or #.
6 Press to start the fax job.
Note: If you are scanning individual pages using the scanner glass, after each page is scanned, the message
Would you like to include another page in the fax? appears to prompt you either to scan
another page or to send the fax right away.
7 If you want to send a fax to a group of numbers (broadcast fax), enter the fax numbers using any combination of
the methods listed in the table that begins with step 4, until a maximum of 30 fax numbers have been entered.
Entering a fax number
1 Make sure the printer is on and is connected to a working phone line.
2 From the control panel, press or repeatedly until Fax is highlighted.
3 Press .
The Fax Mode menu appears.
Faxing using the control panel
152