


1152700 • Issue 1 • February 2001 • Section 2 Operation and Maintenance
Page 2-99
2000, ADC Telecommunications, Inc.
DLP-712
Page 1 of 8
ADD EXPANSION SHELVES (STN-EPS)
Summary: This procedure describes the steps required to successfully add Cellworx STN
expansion nodes (STN-EPSs) into an existing the network. These nodes are referred to as
secondary nodes and are connected to primary nodes to expand access capabilities. This
procedure assumes the user has gained access to and launched the Graphical User interface
(GUI), and the primary NEs and fiber fragments have been discovered. Prerequisites to system
Turn-up are as follows:
• The user must have accessed the system and launched the Cellworx STN GUI.
• All nodes in the network must have fibers connected, and have been powered on.
• All nodes in the network must have the working SC EIM shelf address set for individual
identification (Refer to the Installation Manual listed in the preface of this document.)
• The EPS node must have the shelf type set properly. Refer to the installation manual
listed in the preface of this document.
Note: User may use the mouse to navigate through the GUI menus or by using the Alt +
the underlined letters in the menus and then the arrow keys to scroll up down or across.
Refer to the Graphical User Interface Operation in Section 2 of this document.
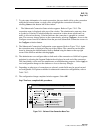
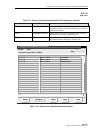
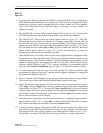
1. Using the left mouse button, select Configuration, Topology, and Add Expansion Shelf
Network Element (or using the direct selection keys, Alt+C, Alt+T then Alt+E). Refer to
Figure 712-1.
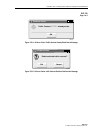
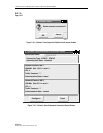
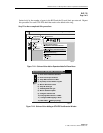
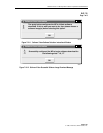
2. The Add EPS NE Task Overview window appears. Refer to Figure 712-2. This window
keeps the user informed of the progress of adding the STN-EPS shelf. During certain tasks
(indicated in process by the pointing finger), a dialog window will appear requesting
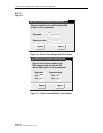
certain information. First, during task number one, the Add EPS NE-Enter Identifier
window appears as shown in Figure 712-3. Using the left mouse button, click, hold, and
drag the slide bar to select the ring node ID that the EPS is connected to. Then do the same
on the Expansion node slide bar to select the EPS shelf ID number. Valid values are 1
through 50 and should reflect the IDs set via the rotary switches on the protect SC EIM
card at the rear of the shelf. Refer to the Installation Manual listed in the preface of this
document for more information on setting shelf Ids. Select Next>> to continue with the
next task. A check box on the task overview window indicates that the tasks are completed.
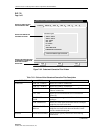
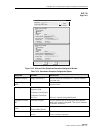
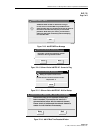
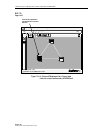
3. A second dialog window titled Add EPS NE - Enter Slots/Ports, appears for task number
two. Refer to Figure 712-4. Type in the slot and port numbers for the ring node that
correspond to the card and port used to link the STN-EPS shelf. The Tab key may be used
to move between the fields. Next enter the slot and port numbers for the STN-EPS shelf
that correspond to the card and port used to link to the ring node. The EPS must use port 1
of the SEPICs (Shelf ExPansion Interface Cards). Select Next>> to continue. If there are
any problems, the error message shown in Figure 712-5 will appear. Click on Retry to
reattempt the discovery or Abort to stop this process.