


1152700 • Issue 1 • February 2001 • Operation and Maintenance
Page 2-343
© 2000, ADC Telecommunications, Inc.
DLP-782
Page 4 of 6
30. Execute the following command to force the NMIC processes to die.
• killall -9 nmic ftpClnt
31. Telnet to the active NMIC using the NMIC specific IP address.
32. Execute the following command to stop all processes running on active NMIC.
• killall psm
33. Execute the following command to force the active NMIC processes to die.
• killall -9 nmic ftpClnt
34. Enter the following command to change to the directory where the database files are stored
on the active NMIC.
• cd /cellworx/config
35. Enter the following command to save off the corrupted NMIC db in case it is needed later:
• mv NMIC NMIC.corrupted
36. Enter the following command to move the backup copy of the NMIC database to the
working copy of the NMIC database.
• mv NMIC.backup NMIC
37. Enter the following command to reboot the active NMIC.
• /sbin/reboot
38. On the standby NMIC: wait 60 seconds and then enter the following command to reboot:
• /sbin/reboot
39. When the active NMIC comes back up, logon to it.
40. Configure the NMIC to launch the display back to the proper machine by entering the
following command:
• export DISPLAY=x.x.x.x:0.0
Note: Here the x.x.x.x is the valid IP address of the PC or workstation that is to receive
the display.
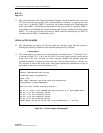
41. Start the Graphical User Interface (GUI) by entering the following command at the NMIC
prompt
• CellworxVision