


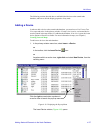


List Views
4-26 Adding Network Elements to the Node Database
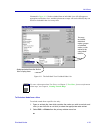
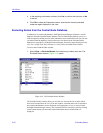
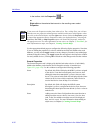
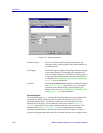
Figure 4-17. The Node Delete Window
3. Click to select the Database option, then click OK to confirm the deletion. The
selected nodes will be removed from the central node database entirely.
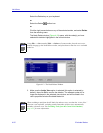
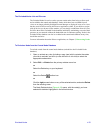
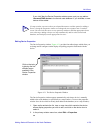
To delete a single node or group of nodes from the Excluded Nodes window:
1. Select View—>Excluded Nodes from the primary window menu bar to
display the Excluded Nodes window.
2. In the main portion of the window, click (or use shift-click or ctrl-click) to select
the nodes you’d like to re-include, then select Delete; or select Delete All to
permanently remove all nodes currently in the excluded nodes list. A text box
opens, asking you to confirm the request to delete the selected item(s).
3. Click Yes to confirm. The node or nodes will be permanently deleted from the
database.
4. Click Close to close the excluded nodes window.
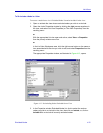
Adding Network Elements to the Node Database
When you perform a network Discover operation, all discovered devices are automatically
added to the central node database, and they will automatically appear in the appropriate
list views. However, you can also add individual devices to the central node database via
the Insert—>Device options available on the primary window menu bar or via the Insert
Device icon on the toolbar. As with discover, nodes individually added to the central
node database are automatically displayed in all appropriate List Views.
TIP
Remember, you can also click on any column header in the Excluded Nodes list to re-sort
the nodes according to the information in the selected column; click again to reverse the
sort order.