


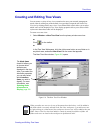

Creating and Editing Tree Views 5-15
Tree Views
• Software Loopback • Ultra Tech • SMDS
• Proteon 80Mbit • Proteon 10Mbit • ATM
• AAL5 over ATM • RS-232 • Parallel Port
• Arcnet • Arcnet Plus • SMDS DXI
• SONET • SONET Path • SONET VT
•SDLC •V.35 •Frame Relay
• Frame Relay Service • HIPPI • HSSI
• X.25 • Proprietary Multiplexing • X25PLE
• M10X25 • Proprietary Virtual/Internal • Generic Modem
• Proprietary PPP Serial • SMDS Intercarrier Interface • Other
As with classes, nodes which support more than one topology will be displayed in any
view for which one of its topologies is selected. You can also choose to filter on nodes
whose topology is unknown.
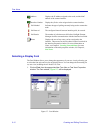
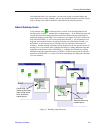
Creating the Filter
When you create a filter, you select the specific attributes in each category that define the
nodes you want to display, and de-select the attributes that define nodes you do not want
to display. Filter categories are linked by logical ANDs, and attributes within categories
are linked by logical ORs; this means that, in order to be displayed in a filtered view, a
node must match at least one selected attribute in each category. You must leave at least
one attribute selected in each category.
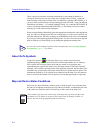
To specify a view filter:
1. In each filter category list box, click on the check box next to the specific
attribute to include or exclude associated nodes from the tree view.
2. Click on OK to set the filter parameters.
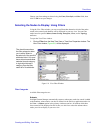
Once you have finished configuring all of the parameters for your tree view, click OK in
the New Tree View window or Tree View Properties window to create the new tree view
or modify an existing view.
TIP
You can also use the select and deselect check boxes located above each filter category
list box to either select or deselect all of its specific attributes; remember, however, that
you must leave at least one attribute selected in each category in order to create your
filter.