


Customizing Your Map 6-37
Creating Network Maps
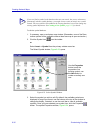
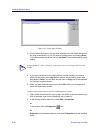
3. The Sample portion of the window will display your changes as you make
them; when the sample displays the look you want to achieve, click OK to
apply changes and exit the window.
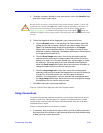
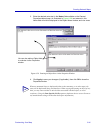
You can also reshape existing objects, as follows.
To reshape an existing line:
1. Click once on the line to display the handles for its vertices.
2. Move the mouse cursor over a handle to activate reshaping for that vertex
(the cursor will display as a dual-headed arrow).
3. Click on the handle and drag the vertex to a new position (its neighboring
vertices will remain fixed).
4. Release the mouse and move the cursor off the handle to restore the pointer.
To resize an existing shape:
1. Click once on the object to display its resizing handles.
2. Move the mouse cursor over a handle to activate resizing (the cursor will
display as a dual-headed arrow).
3. Click on the handle and drag horizontally, vertically, or diagonally to resize the
shape.
4. Release the mouse and move the cursor off the handle to restore the pointer.
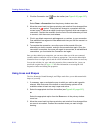
Using Text
In addition to the labels provided with icon and symbol elements, you can also add
independent text boxes to your map.
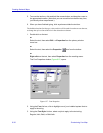
1. If necessary, open or activate the map to which you wish to add text. Note that
none of the toolbar or menu drawing options will be available unless at least
one map is open and active.
2. Select the Text tool from the toolbar (see Figure 6-20, page 6-27).
or
Select Draw—>Text from the primary window menu bar.
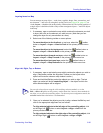
3. Move the cursor back into the map window, and note that it has changed from
an arrow to an I-bar. Position the cursor where you want to begin typing, and
click the mouse button. A text box opens in the map.
4. Enter text into the text box as desired. The text box will automatically extend
to the right as you type, but note that you cannot add a carriage return.