


Creating Network Maps
6-28 Customizing Your Map
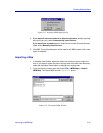
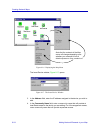
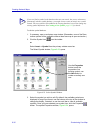
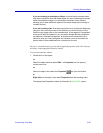
The Select Symbol window, Figure 6-21, opens.
Figure 6-21. Select Symbol Window
3. Select the symbol you wish to add. By default, the available symbols are
displayed in Large Icon format; use the buttons at the top of the window (see
Figure 6-21) to change the display, if desired, or use the scroll bar to view all
available symbols. Once you have selected your symbol icon, click OK.
4. Move the cursor back into the map window, and note that it has changed from
an arrow to a crosshair. Position the crosshair where you want to place the
symbol, then click to place the symbol in your map. The symbol will be
displayed with its default label. (To change the label, see Editing Individual
Symbol Properties, page 6-29.)
These symbols do not report node status nor provide access to node management.
Editing Symbol Properties
If you wish, you can edit symbol properties on two levels: you can edit the properties of an
individual symbol you have placed on a map, assigning it a unique label; you can also edit
the symbol database, either by changing the way a symbol is defined or displayed, or by
creating an entirely new symbol.
!
CAUTION
When you edit the symbol database, you are changing the basic information NetSight
Element Manager uses to define and display symbols. These changes cannot easily be
undone; if you choose to do this, exercise appropriate caution.
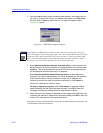
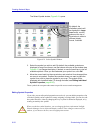
By default, the
available symbols will
be displayed in Large
Icon format; use the
buttons at the top of
the window to select a
different display
format, if desired.