


Overview of NetSight Element Manager
2-28 Customizing NetSight Element Manager
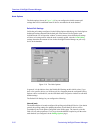
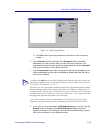
2. In the edit box provided, enter the text you want to appear in the Tools menu
for the new entry. Place an ampersand (&) before the character you’d like to
use for the access key.
3. In the Hint text field, enter the text you want displayed in the status bar at the
bottom left of the primary NetSight Element Manager window when the menu
item is selected or the cursor is positioned over its associated toolbar icon.
This information is optional; you can also leave the field blank.
4. In the Tool Tip text field, enter the text you want displayed in the tooltip
pop-up when the cursor is positioned over the associated toolbar icon. This
field is also optional, and can be left blank.
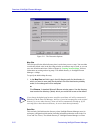
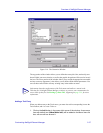
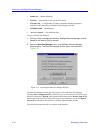
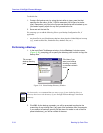
5. To select an image to use for the toolbar icon, click on Select to launch the
Select Image window, Figure 2-15. Once there:
a. Click Browse and in the resulting File Open window, select the bitmap file
you wish to use as a basis for the toolbar icon, then click Open. The
selected bitmap image will be displayed in the Images: display area in the
window. (If the image is too big in either dimension to be fully displayed, a
message window opens, indicating that the image will be cropped to fit.)
b. Click the Small Image radio button, then move the resulting square
selection cursor around on the image to select the portion you wish to
display for the toolbar icon, and click again to make the selection. The
image portion you have selected will be displayed below the Small Image
radio button. Move the cursor and click again to change this selection until
you find the one you want.
c. If you wish, click the Large Image radio button, then move the resulting
square selection cursor around to select the image portion you wish to
display for a large icon, and click again to make the selection. The image
portion you have selected will be displayed below the Large Image radio
button. Move the cursor and click again to change this selection until you
find the one you want. This image isn’t displayed anywhere except in this
window, but you may want to go ahead a select one for consistency. If
you don’t select one, the default image will remain in place.
NOTE
If you select an access key that is already in use, a message window will note this when
you try to enter your new item name. If you choose to configure an access key, it must be
unique or the new Tools item cannot be added.
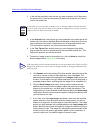
TIP
If the executable you have selected already has an icon associated with it, that icon will be
displayed by default; you can use the icon image provided, or change this default via the
following steps.