


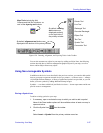


Creating Network Maps
6-30 Customizing Your Map
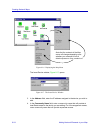
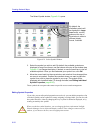
To edit the symbol database:
1. If necessary, open or activate a map window. (Remember, none of the Draw
toolbar options will be available unless at least one map is open and active.)
2. Click the Symbol icon from the toolbar.
or
Select Insert—>Symbol from the primary window menu bar.
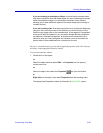
The Select Symbol window, Figure 6-23, opens.
Figure 6-23. Select Symbol Window
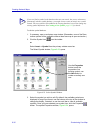
3. Select the symbol you wish to edit. By default, the available symbols are
displayed in Large Icon format; use the buttons at the top of the window to
change the display, if desired, or use the scroll bar to view all available
symbols. Once you have selected your symbol icon, click the Properties
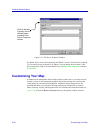
button. The symbol Properties window, Figure 6-24, opens.
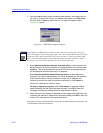
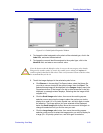
TIP
If you can’t find a symbol in the database that suits your needs, but you are reluctant to
permanently edit the symbol database, you might want to create an entirely new symbol
instead. This new symbol will be added to the existing database, but will not change any
existing symbol definitions. See Creating a New Symbol, page 6-32, for details.
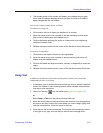
Use the Properties
button to edit the
properties of an
existing symbol; use
the New button to
create an entirely new
one.