


Customizing NetSight Element Manager 2-27
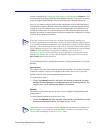
Overview of NetSight Element Manager
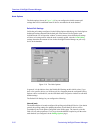
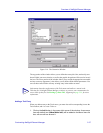
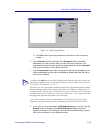
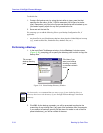
Figure 2-14. The Customize Window
The top portion of the window allows you to define the menu pick, hint, and tool tip text
that will label your new selection, as well as the graphic image that will be used as its tool
bar icon. The lower portion of the window allows you to assign the appropriate executable
and any necessary arguments; it also allows you to define certain launch parameters. You
can use these same fields to edit any existing entry in the toolbar or menu.
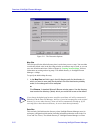
Adding a Tool Entry
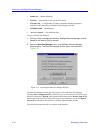
When you add an entry to the Tools menu, you must also add a corresponding icon to the
Tools toolbar, and vice versa. To do so:
1. Click on the Add button in the upper-right corner of the window. A new menu
item with default text (&New Menu Item) will be added to the Menu Items list
box, with an edit box around it.
TIP
Information about the configuration of the Tools menu and toolbar is stored in the
Tools.dat file (\NetSight Element Manager x.x\data); to preserve your customization, be
sure to back up this file. See Backing Up Data Files, beginning on page 2-30, for more
information.