


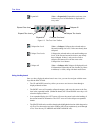

Creating and Editing Tree Views 5-7
Tree Views
Creating and Editing Tree Views
You can create a variety of tree views customized to meet your network management
needs, either by editing any of the default views provided (except the All Nodes Tree
View) or by creating entirely new views. User-defined filter criteria allow you to select
which nodes will be displayed; Tree View display properties allow you to select which
information about those nodes will be displayed.
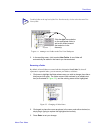
To create a new tree view:
1. Select Window—>New Tree View from the primary window menu bar.
or
Click on the toolbar.
or
In the Tree View Workspace, click the right mouse button on any folder or in
any blank area, and select New View from the menu that appears.
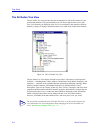
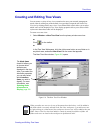
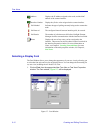
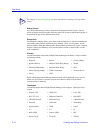
The New Tree View window, Figure 5-6, opens.
Figure 5-6. The New Tree View Window
NOTE
When you add a new tree view by any of the means described above, it will be added to
the folder which is currently selected in the Tree View workspace; if you add a tree view
by right-clicking in a blank area of the workspace, the new view will be added to the root
folder. Once a Tree View has been added, it cannot be moved from folder to folder. All
folders and views are listed in the workspace in alphabetical order.
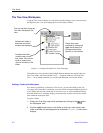
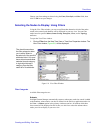
The Node Items
check list allows you
to choose which
attributes are
displayed in the tree
view; if you select the
Interfaces properties,
you can also select
which Interface
Items you wish to
display. For more
information, see
Selecting Node
Information to
Display, page 5-8.