


Batch Customization via AddTool, AddImage, and AddDevType
A-8 Using the AddImage Utility
...
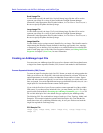
Image type : enterprise
Image name : Mom-n-Pop
Small image file : c:\small_icons\folks16.bmp
Large image file : c:\small_icons\folks32.bmp
Image id : 714
...
Executing the AddImage Command
Once you have created the necessary input files, you can run the AddImage utility via the
Run window, as follows:
1. Make sure NetSight Element Manager and all of its components are shut
down; the AddImage utility will not run if NetSight Element Manager is
running.
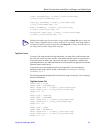
2. Select Start—>Run from the Windows Start button, then enter the following
command in the Open field:
C:\NetSight Element Manager x.x\bin\AddImage.exe [/M]
[/D] input_filename
where:
/M or /m signals that the input file is in multi-line tag/data format
/D or /d signals that the input file is in CSV format, but does not contain the
initial descriptive line
input_filename specifies the path and filename of your input file
3. Click OK to launch the utility.
If the tool did not run successfully, an error message will appear, indicating the source of
the problem. Note that the tool stops executing at the first error, so if your file contains
multiple errors, they will only be detected one at a time. If no message windows appear,
the tools have been added successfully.
TIP
Although the sample input file shown here assigns a different Image ID value to each new
image, images of different types can share Image IDs. For example, each image added by
this input file could have been assigned the same Image ID, as long as that ID value was
not being used by another image of the same type.
NOTE
Once you have added images to the NetSight Element Manager framework, they can only
be removed by using the Restore from new function in the Data File Manager (described
in Backing Up Data Files in Chapter 2, Overview of NetSight Element Manager). This
will restore all configurable files to their default values.