


Customizing Your Map 6-27
Creating Network Maps
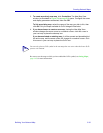
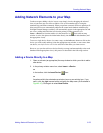
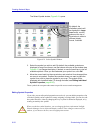
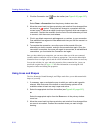
Figure 6-20. Drawing, Alignment, and Layering Tools via the Toolbar
You can also annotate any object in your maps by adding an Object Note; the following
sections describe how to add non-management graphic objects to your map, as well as
how to add an Object Note to any object.
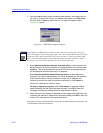
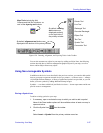
Using Non-manageable Symbols
In addition to the device icons described in the previous sections, you can also add symbol
icons to your map to represent network devices you cannot — or choose not to — manage
via NetSight Element Manager. A library of predefined symbols are provided, or you can
define your own symbols by adding additional bitmap images.
Symbols — even those which look just like device icons — do not report status and do not
provide access to management.
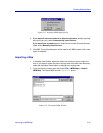
Placing a Symbol Icon
To add an existing symbol to your map:
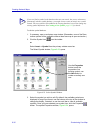
1. If necessary, open or activate the map to which you wish to add a symbol.
None of the Draw toolbar options will be available unless at least one map is
open and active.
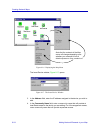
2. Click the Symbol icon from the toolbar.
or
Select Insert—>Symbol from the primary window menu bar.
By default, drawing
tool buttons are
displayed vertically
on the right side of
the primary window.
By default, alignment tool buttons are
displayed at the bottom of the primary window.
Line Tool
Rounded Rectangle
Rectangle Tool
Ellipse Tool
Pointer Tool
Map Tools include the Add
Submap and Add GoTo buttons, as
well as the layering tool buttons.
Text Tool
Symbol Tool
Connection Tool