


Batch Customization via AddTool, AddImage, and AddDevType
A-4 Using the AddTool Utility
need not use placeholders for optional fields you do not wish to use. The end of each entry
is signaled by a separator line containing three dots; any additional blank lines between
entries are ignored. Note that the filename cannot contain spaces.
If you choose to use the tag/data format for your input files, you must launch the AddTool
utility with a special switch, as described in Executing the AddTool Command,
page A-4.
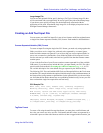
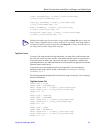
The following tag/data formatted file would add the MIB Tools and Notepad utilities to
the Tools menu and toolbar; it also demonstrates that optional fields you do not wish to
use need not appear in the tool entry.
Tag/Data Sample File
Menu text : MIB &Tools
Hint text : Launch the MIB Tools application
Bubble text : MIB Tools
Command : MIBMGR.EXE
Arguments : /ip %I /comm %C
Working directory : D:\NetSight Element Manager x.x\DATA
Small image file : smlLeaf.bmp
Large image file : lrgLeaf.bmp
...
Menu text : &Notepad
Hint text : Launch Notepad
Bubble text : Notepad
Command : C:\WINNT\notepad.exe
Small image file : C:\images\small_note.bmp
Large image file : C:\images\large_note.bmp
...
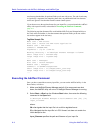
Executing the AddTool Command
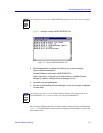
Once you have created the necessary input files, you can run the AddTool utility via the
Run window, as follows:
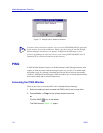
1. Make sure NetSight Element Manager and all of its components are shut
down; the AddTool utility will not run if NetSight Element Manager is running.
2. Select Start—>Run from the Windows Start button, then enter the following
command in the Open field:
C:\NetSight Element Manager x.x\bin\AddTool.exe [/M] [/D]
input_filename
where:
/M or /m signals that the input file is in multi-line tag/data format
/D or /d signals that the input file is in CSV format, but does not contain the
initial descriptive line
input_filename specifies the path and filename of your input file