


Creating Network Maps
6-14 Building Your Network Map
1. If necessary, open or activate the map to which you wish to add a submap
icon.
2. In primary window menu bar, select Insert—>Sub Map.
or
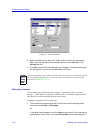
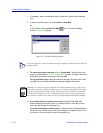
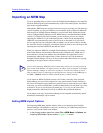
In the toolbar, click the Insert Sub Map icon. The Insert SubMap
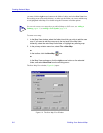
window, Figure 6-8, displays.
Figure 6-8. The Insert SubMap Window
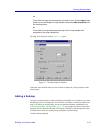
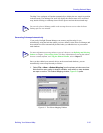
3. To create an entirely new map, click on Create New. The New Map View
window (as illustrated in Figure 6-4 on page 6-8) opens. Configure the name
and display parameters as desired, then click OK.
To link an existing map, select the name of the map you wish to link, then
click OK. Only the maps available for submap linkage will be listed.
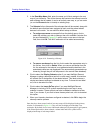
4. If you have chosen to create a new map, closing the New Map View
window changes the arrow cursor to a crosshair cursor; click this cursor in
your root map to place the submap icon.
If you have selected an existing map, it will be opened and placed behind
the active map, and the arrow cursor will change to a crosshair cursor. Click
this cursor in your root map to place the submap icon.
TIP
If no other maps have yet been created, inserting a submap will launch the New Map View
window directly.
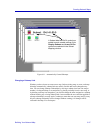
NOTE
Remember, any map can only be defined as the submap of one root map. If you select a
map which is already a submap of another map, the original submap link will be broken,
and the new link established. This change will be reflected in the Map View workspace,
and the invalid submap icon will be automatically removed from the original map, but
you will not be notified in any other way that a submap relationship has been changed.