


Discovering Nodes
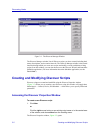
3-8 Creating and Modifying Discover Scripts
Subnets will be defined automatically each time a device is added to the node database
(either manually or via a Discover script); they can also be defined manually, either via the
Discover Properties window (as described in this section) or via the View—>Subnets
window available from the NetSight Element Manager primary window menu bar. (See
Using the Subnets Window, page 3-27, for more information about viewing subnets.)
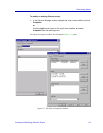
To specify a subnet (or subnets) for your device discover script:
1. To define a new subnet, click New to the right of the Subnets group box; or
click the right mouse button anywhere in the Subnets group box, and select
New from the resulting menu.
To modify an existing subnet, highlight the subnet entry that you wish to
change, and click Properties; or click the right mouse button on the subnet
entry that you wish to modify, and select Properties from the resulting menu.
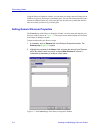
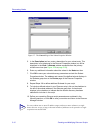
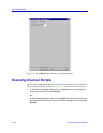
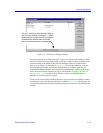
The Subnet Properties window (Figure 3-6) opens.
Figure 3-6. The Subnet Page of the Subnet Properties Window
2. Place the cursor in the Subnet field and type the network and subnet portions
of the IP Address for the subnet that you wish to discover. For example, to
discover the subnet containing the Class B IP Address 132.177.118.24, type
132.177.118.0 in the Subnet field).
TIP
This subnet information is used to determine the map hierarchy created via the automatic
subnet mapping feature; for more information on this feature, see Generating Submaps
Automatically in Chapter 6, Creating Network Maps.