


Using the AddImage Utility A-7
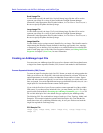
Batch Customization via AddTool, AddImage, and AddDevType
class, Roundabouter, c:\small_icons\round16.bmp,
c:\big_icons\round32.bmp, 711
topology, RoundLAN, c:\small_icons\LAN16.bmp,
c:\big_icons\LAN32.bmp, 712
model, KidMobile, c:\small_icons\car16.bmp,
c:\small_icons\car32.bmp, 713
enterprise, Mom-n-Pop, c:\small_icons\folks16.bmp,
c:\small_icons\folks32.bmp, 714
Tag/Data Format
To create a file using the multi-line tag/data format, you must place each field name and
the value you want to use in its own line. Field names and their values are separated by a
colon with a space on either side. The end of each entry is signaled by a separator line
containing three dots; any additional blank lines between entries are ignored. Note that the
filename cannot contain spaces.
If you choose to use the tag/data format for your input files, you must launch the
AddImage utility with a special switch, as described in Executing the AddImage
Command, page A-8.
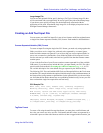
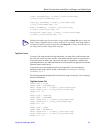
The following tag/data formatted file would add one image of each type: Class, Topology,
Model, and Enterprise.
Tag/Data Sample File
Image type : class
Image name : Roundabouter
Small image file : c:\small_icons\round16.bmp
Large image file : c:\big_icons\round32.bmp
Image id : 711
...
Image type : topology
Image name : RoundLAN
Small image file : c:\small_icons\LAN16.bmp
Large image file : c:\big_icons\LAN32.bmp
Image id : 712
...
Image type : model
Image name : KidMobile
Small image file : c:\small_icons\car16.bmp
Large image file : c:\small_icons\car32.bmp
Image id : 713
TIP
Although the sample input file shown here assigns a different Image ID value to each new
image, images of different types can share Image IDs. For example, each image added by
this input file could have been assigned the same Image ID, as long as that ID value was
not being used by another image of the same type.