


Using the AddImage Utility A-5
Batch Customization via AddTool, AddImage, and AddDevType
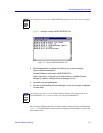
3. Click OK to launch the utility.
If the tool did not run successfully, an error message will appear, indicating the source of
the problem. Note that the tool stops executing at the first error, so if your file contains
multiple errors, they will only be detected one at a time, each time you run the tool If no
message windows appear, the tools have been added successfully.
Using the AddImage Utility
NetSight Element Manager classifies devices according to what is called a Node Class.
Each defined Node Class specifies four kinds of attributes that describe the device: Model
(the model type of the device, such as CSX200 or 6H123-50), Class (the functional
classes supported by the device, such as Switch, Repeater, etc.), Topology (topologies
supported by the device, such as FDDI, Token Ring, or Ethernet CSMACD), and
Enterprise (the manufacturer of the device). NetSight Element Manager provides many
pre-defined model, class, topology, and enterprise definitions, but if you wish you can use
the AddImage tool to add any additional ones you might need. The AddImage tool
performs the same function as creating a new image via the Node Class Properties
window (as described in Editing Node Class Properties in Chapter 4, List Views).
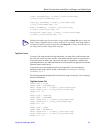
As with AddTool, to use the AddImage utility you must prepare an input file in one of two
formats — comma-separated variable (CSV), or tag/data format — which contains the
following information for each image you wish to add:
Image Type
Use this parameter to specify which type of image you wish to add: Model, Class,
Topology, or Enterprise. Each image can be assigned only a single type, but you can
create a file which contains definitions for more than one type.
Image Name
Use this parameter to specify the name that will be assigned to your image. Note that the
case of this name is significant; an image named “superzippy” will not be found in a
device type definition (see Using the AddDevType Utility, page A-9) that references an
image named “SuperZippy.”
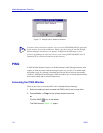
NOTE
Once you have added tools via the AddTool utility, they can only be removed via the
Tools—>Customize window available from within the framework. See Customizing the
Toolbar in Chapter 2, Overview of NetSight Element Manager.
TIP
For more information about creating an entirely new node class, see Using the
AddDevType Utility, page A-9.