


Adding Network Elements to your Map 6-25
Creating Network Maps
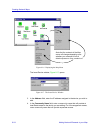
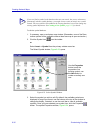
5. If the device is successfully contacted, the Device Properties window,
Figure 6-19 (page 6-26), opens. Make any changes to the properties, as
desired, then click on OK. The arrow pointer will become a crosshair cursor;
click the cursor in the active map window to place the new icon.
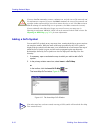
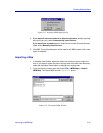
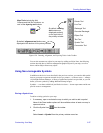
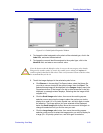
If the device cannot be contacted, the Insert Device window will expand to
display the Timeout and Retry counters, and a message window opens (as
illustrated in Figure 6-18).
Figure 6-18. Device Timeout Windows
If you click Yes, the Device Properties window opens, and you can add an
Unnamed PING device to your map. If you click No, no new device will be
added.
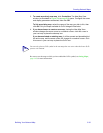
If the device you are adding is already part of the database, a message window displays
after you close the Properties window, indicating that the selected node already exists.
Click OK, and a crosshair cursor displays allowing you to place the icon; there is no
restriction on placing duplicate copies of the same icon in a single map or on multiple
maps.
TIP
If you have configured and activated the Autofill options (either via the Welcome Wizard
or via the Tools—>Options window), the autofill values you have set for IP address and
community name display automatically in the appropriate fields. You can keep these
options or replace them, as necessary.
TIP
You can change the icon assigned to an Unnamed PING Device so that it more accurately
reflects the actual device being monitored; see Editing Device Properties in Chapter 4,
List Views, for details.
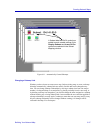
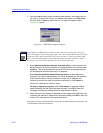
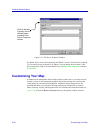
If the selected device does not
respond within the defined number
of retries, you will be given the
option to create a PING device.