


Customizing NetSight Element Manager 2-29
Overview of NetSight Element Manager
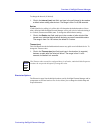
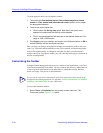
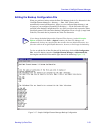
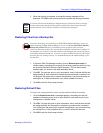
Figure 2-15. Select Image Window
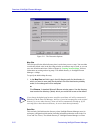
d. Click OK to save your image selection(s) and return to the Customize
window.
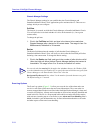
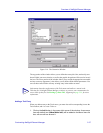
6. Use the Browse button to the right of the Command field to locate the
executable you wish to launch with your new Tools menu selection. The
executable path and file name cannot be entered directly into the Command
field; you must select it via the Browse window.
7. Use the Arguments field to add any arguments that can be accepted by your
chosen executable and that you want added by default each time the icon or
menu pick is selected.
8. If you wish, you may also specify a Working Directory for your tool. Use the
Browse button to the right of the Working Directory field to locate the
appropriate directory. The directory name cannot be entered directly into the
field; you must select it via the Browse window.
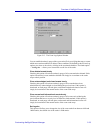
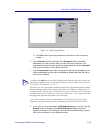
TIP
Clicking on the Build button will launch a Build window that may help you construct the
appropriate argument string; for more details on how to use this window, see Building an
Argument List in Chapter 4, List Views.
Note that if you select an argument symbol that will extract information from the NetSight
Element Manager database (for example, %i to insert an IP address, or %c to insert a
community name), the menu item and tool bar icon for your application will only become
available when a device is selected in a List, Tree, or Map View — this will guarantee that
the appropriate argument information can be obtained.
If you select a specific value for a build argument, or if you do not specify any build
arguments, your Tools menu item and its accompanying icon will always be available.